

Have you ever wondered what it would be like to have your own server? A server is a computer that runs 24/7 and hosts various services and applications that you can access from anywhere. You can use it to store your files, stream your media, run your email server, chat with your friends, and much more. Having a home server gives you more control, privacy, and freedom over your digital life.
In this blog post, I will be sharing with you some of the benefits and challenges of running a home server, and how you can get started with one today.
Minimum Recommended hardware:
CPU: 64bit (Intel EMT64 or AMD64) Intel VT/AMD-V capable CPU/Mainboard (for KVM full virtualization support)
Memory: Minimum 8 GB RAM
Hard drive (Optional - SSD Drive for OS )
One NIC
You can refer official Proxmox doc for more info. link - System Requirements
My Setup - Turning My First PC into a Home server
So I used the first PC my dad bought for me, which had been lying around in the corner for years. I and my cousin used to play a lot of games, watch movies, and have had great fun working with Windows XP.
I salvaged some components including chassis fans and the power supply Unit. Had to make certain changes in its structure and finally it is as good as new.

I will be using 3 x drives. 1 x SSD drive for OS setup and 2 x HDD drives for NAS
The setup consists of 6 stages, each implementing additional features of the architecture:
Stage 1 - Prepare Proxmox PVE Server installation media and proceed with the setup
Stage 2 - Creating a VM for the TrueNAS Scale Server
Stage 3 - Passing through PCI Drives, NIC, and graphic card in Proxmox for TrueNAS
Stage 4 - Setup and Configure TrueNAS Scale server
Stage 5 - Creating Samba share or Configure iSCSI Block storage
Stage 6 - Exposing the Server to the Internet
Instructions
Stage 1 - Prepare Proxmox PVE Server installation media and proceed with the setup
Installation of Proxmox is pretty straightforward. We will be using an SSD drive for an OS setup.
We will be dividing the setup into two parts:
1. Proxmox Server Installation
2. Post-Install Configuration
Proxmox Server Installation
Download the Proxmox VE ISO image (You can choose any version) from the link - https://www.proxmox.com/en/downloads/proxmox-virtual-environment/iso
Prepare Installation media. Burn the ISO image file to a CD or set up the USB drive using Rufus for Windows and Etcher for Linux or else you can use any favorable software.
For more details refer link - https://pve.proxmox.com/wiki/Prepare_Installation_Media#installation_prepare_media
Starting with Installation Procedure:
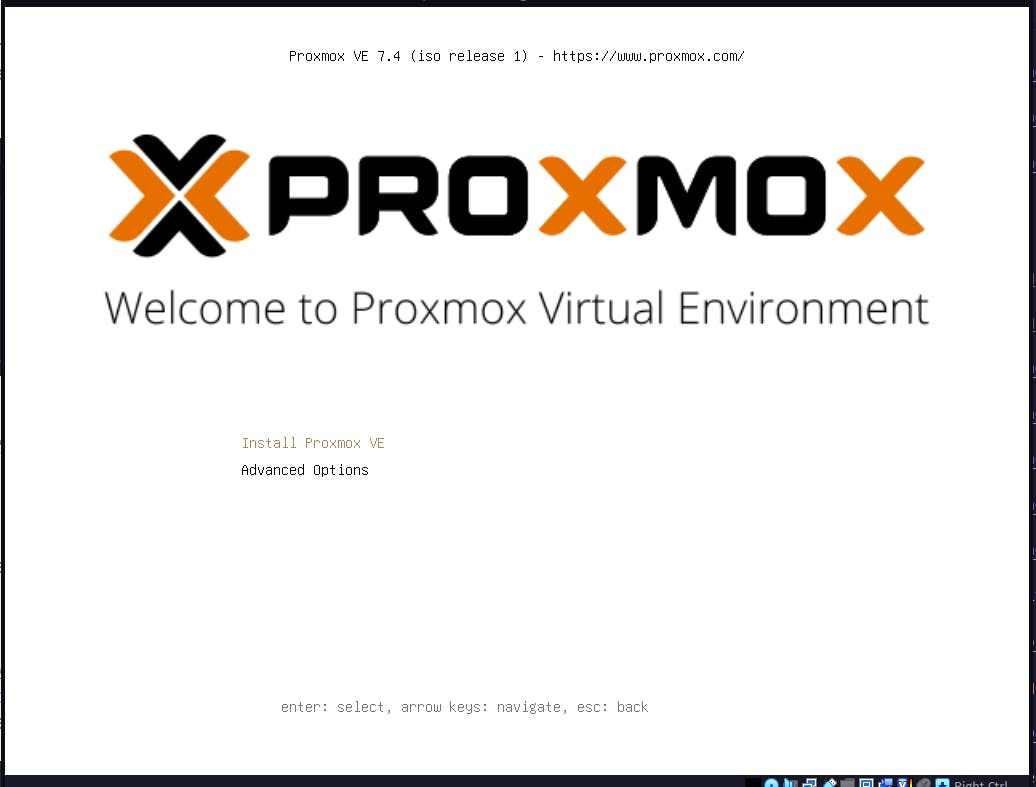
Boot into installation media and select "Install Proxmox VE" from the Menu
Select SSD drive for OS installation in Target Harddisk. Proxmox uses a whole disk for the setup instead of a partition when installing via ISO image and proceed with setup by clicking on the Next button.
Fill up the Location, TimeZone, and Confirm the password.
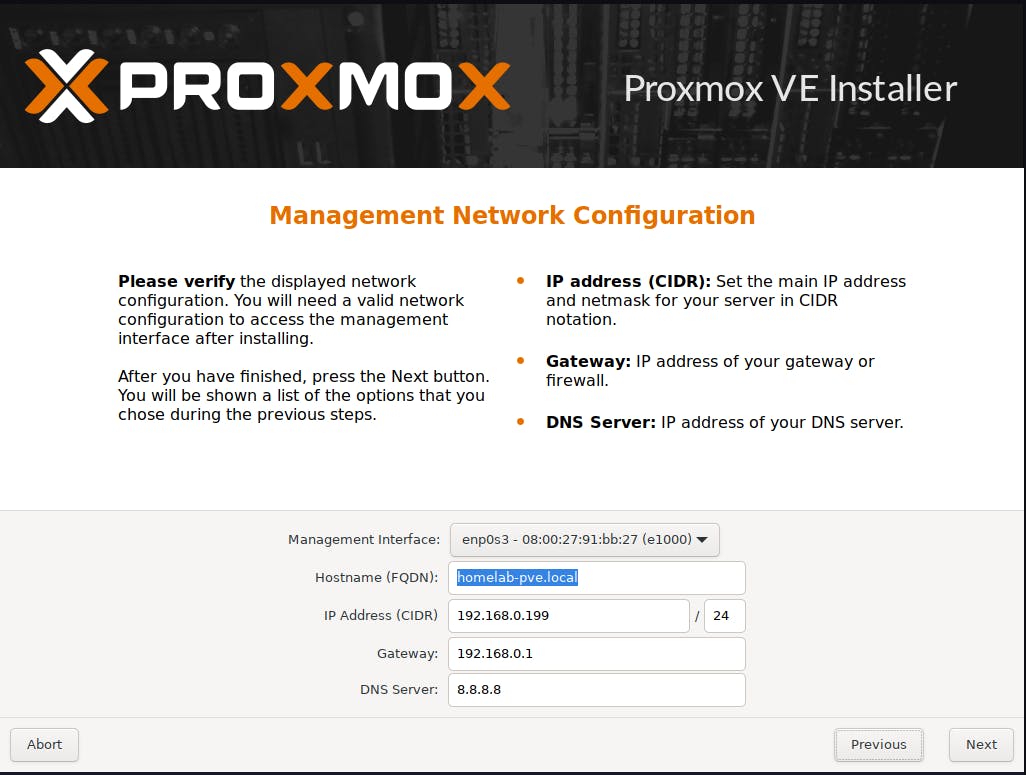
Set Up Network :
Select the required Network interface in case you are using a NIC card make sure you select it here in the Management Interface tab.
Setup Hostname, IP Address, Gateway, and DNS server as per your preferred way
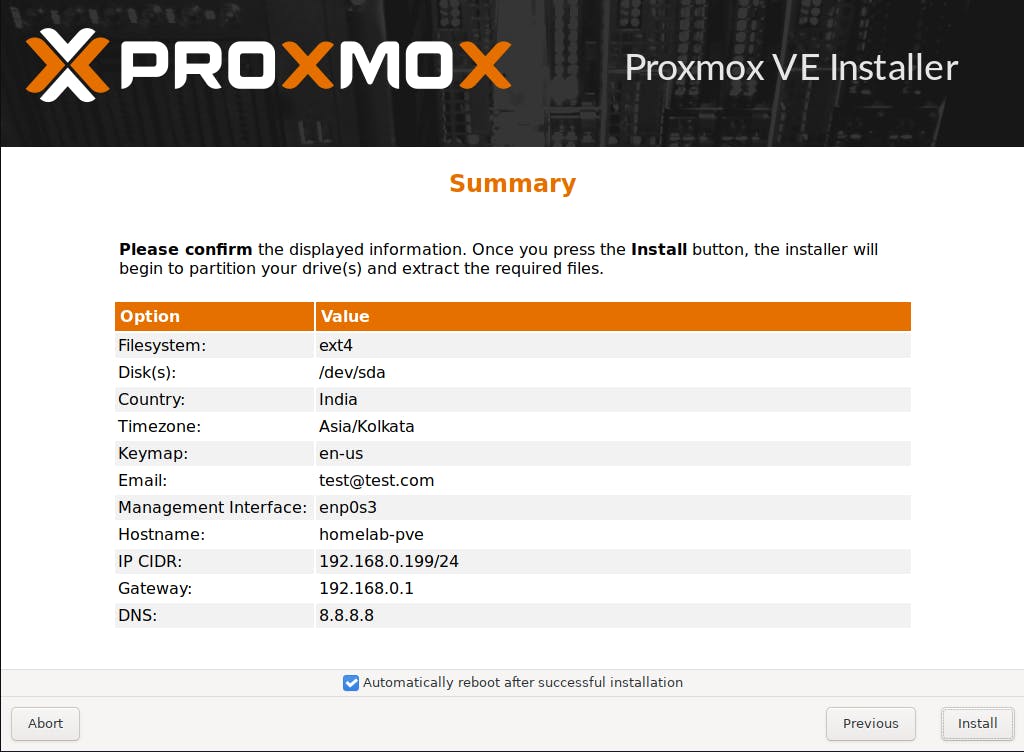
Verify and Confirm the summary and click on the Install button.
Once the Installation is completed successfully you will get a prompt on the terminal about the access to Proxmox Web UI.
In my case it is
https://192.168.0.199:8006You can use any browser, it will ask for a password.Use the same credentials that you used earlier at the time of installation
rootas a user.
Reference: https://pve.proxmox.com/wiki/Installation
Post-Install Configuration of Proxmox Server
After Installation, we are ready to create our first VM in Proxmox. Before that, we need to perform some short steps to make our server production-ready.
Increase the Storage
If you notice after clicking
local-vmit shows less space as compared to the whole drive which we used for the installation.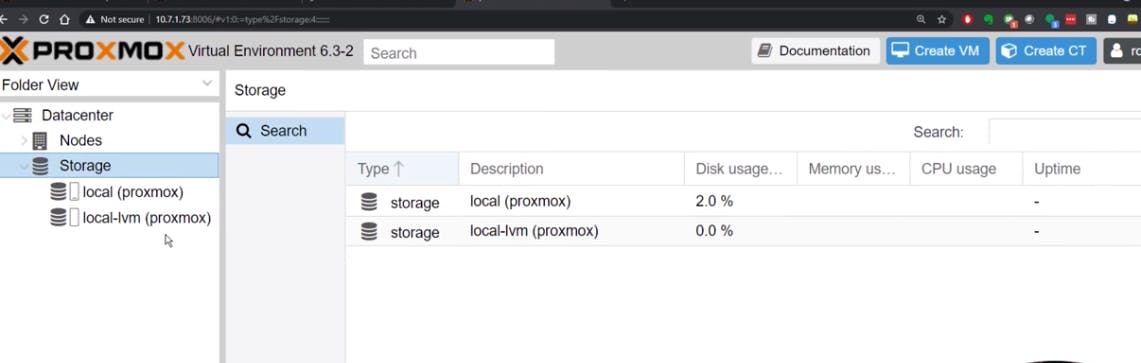
Stage 2 - Creating a VM for the TrueNAS Scale Server
TrueNAS Scale is a powerful free network-attached storage (NAS) with an easy-to-understand graphical user interface, making set-up a relatively intuitive process. In this guide, I’ll walk you through the process of installing and configuring TrueNAS.
I will need this TrueNAS Server for setting up my media server Plex.
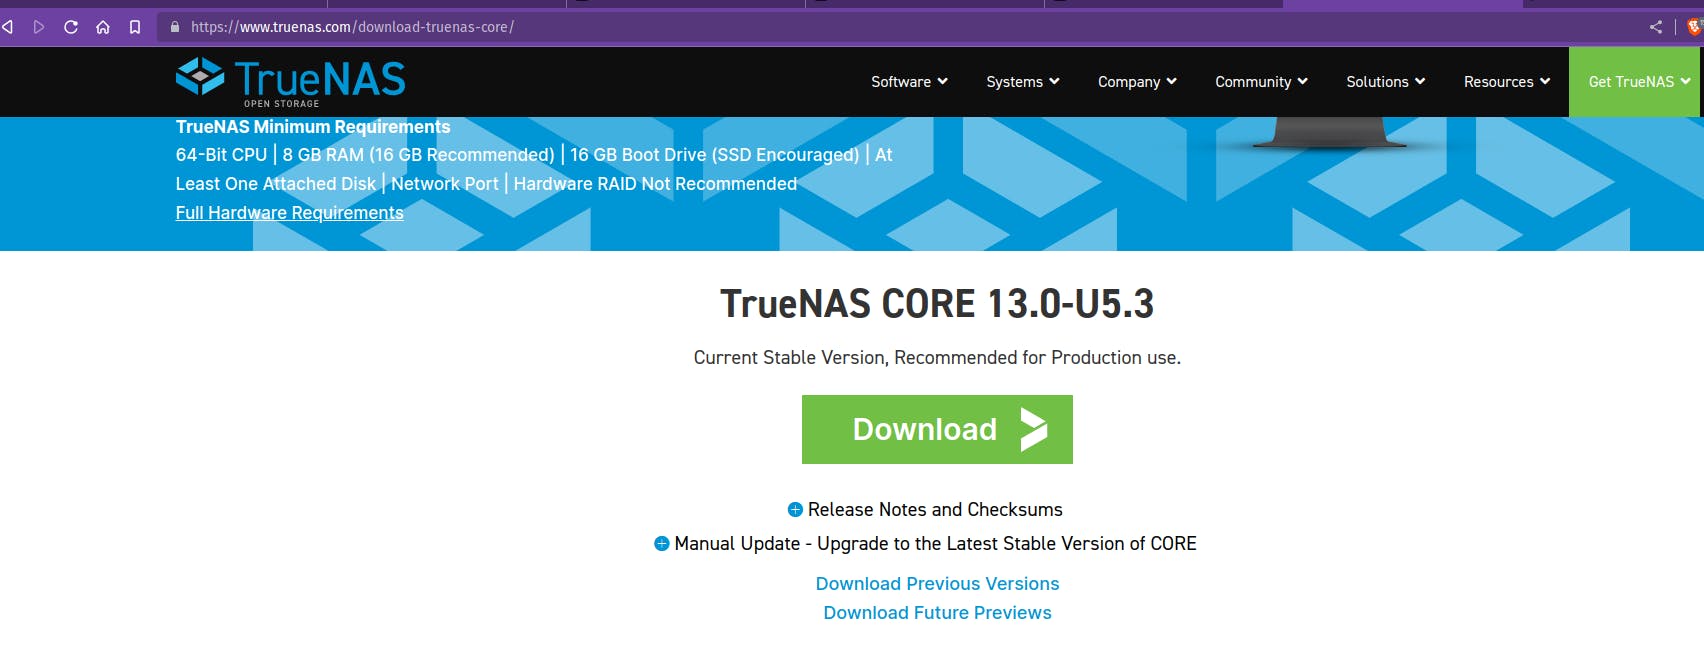
Downloading and Installing TrueNAS
Download the latest version of TrueNAS Scale from https://www.truenas.com/download-truenas-scale/
Get the Download URL from this page.
Downloading ISO image in Proxmox local storage
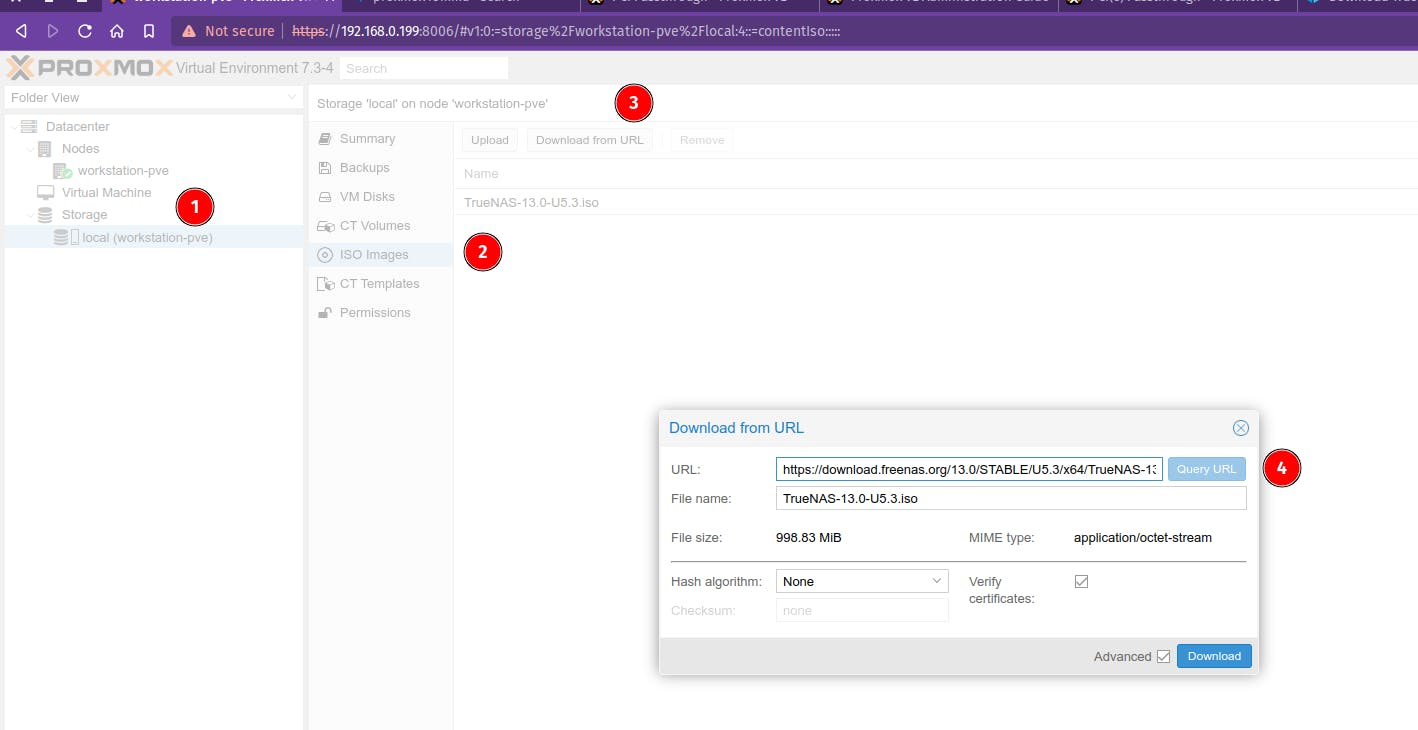
Click on Storage
Select ISO images
Click on Download from the URL
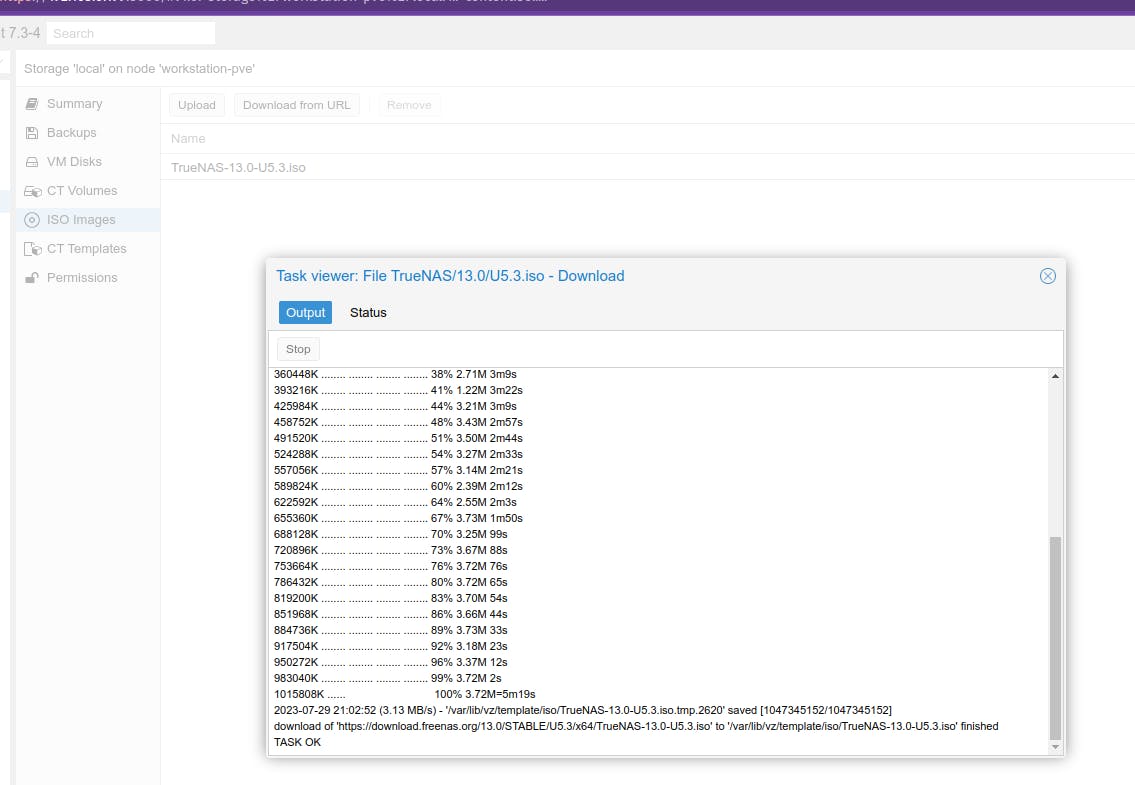
Paste the link obtained from the download page for the ISO image. The download process will start as mentioned in the below screenshot.
Creating a VM for True NAS
Once the image is downloaded head towards the 'Create VM' button at the top left side. Follow the options displayed in the images below.
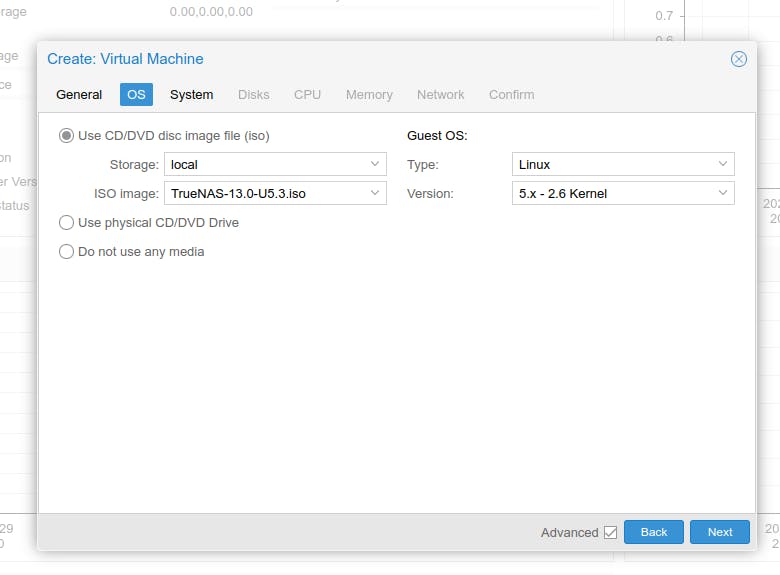
Select True NAS ISO image and keep the rest of the parameters default.
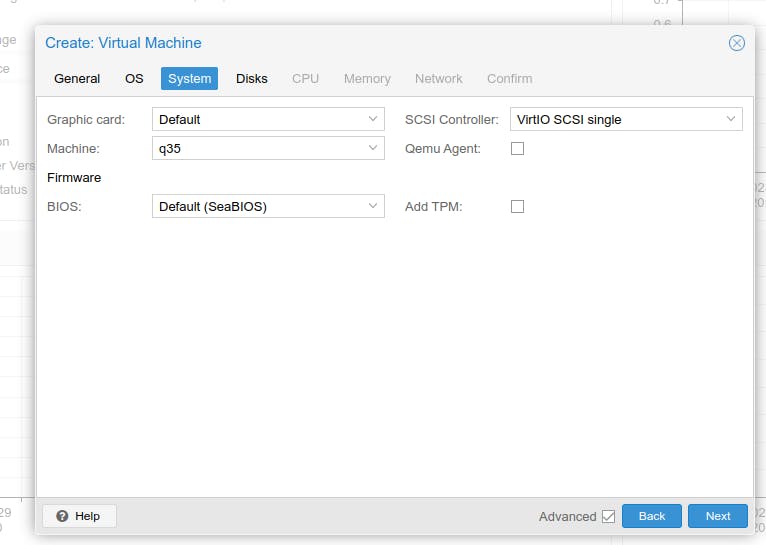
System Section -
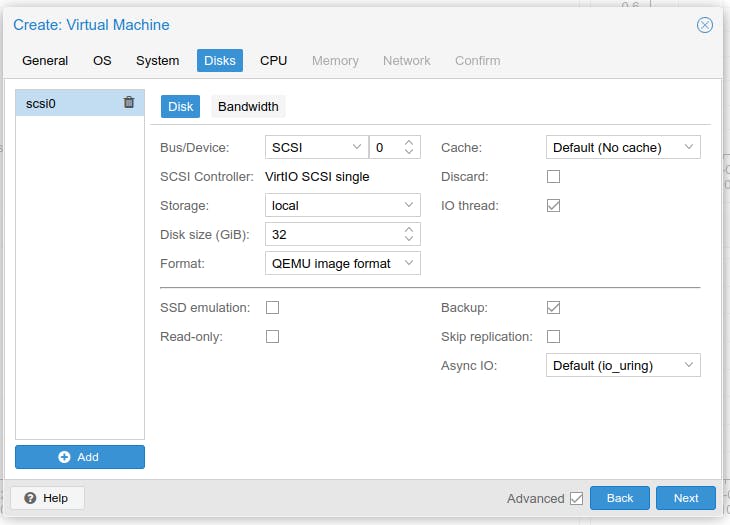
Disks Section - Seeting 32Gb for OS setup
CPU - Giving 4 CPU cores

Memory -

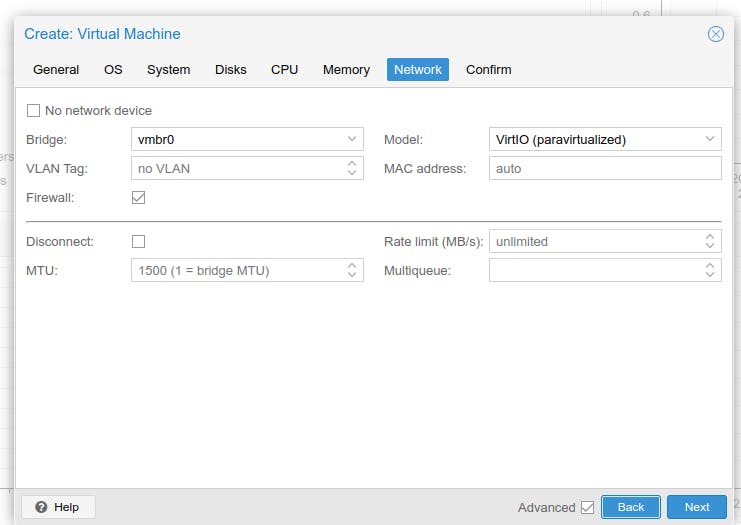
Network - Select vmbr0 which is a virtual Bridge Network of our Sersr's ethernet.
Passing through My Drives in Proxmox for VMs
Below is the command to display the drives installed on your server.
lsblk -o +MODEL, SERIAL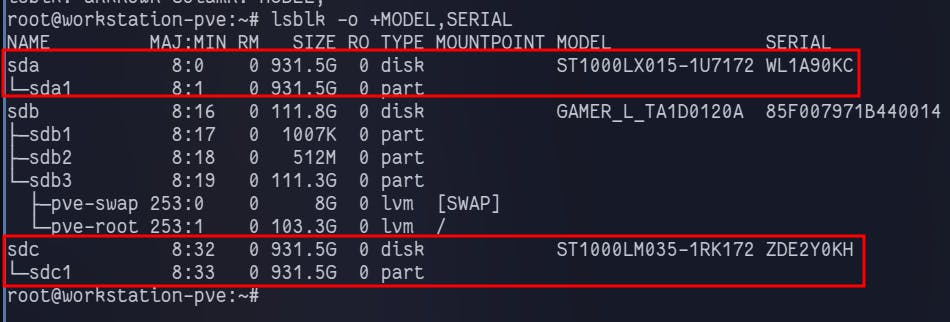
I will be using these 2 x 1TB Seagate drives for my NAS.
Selecting and Mounting the Drives
ls /dev/disk/by-id
You can cross-verify the disks using the Serial number here from lsblk command.
qm set command to pass through the drives
qm set <id_of_the_vm> -scsi(0,1,2,3....n) /dev/disk/disk-by-id/ata-serial_of_disk-some_numberPlease refer above screenshot for reference.
Refresh the UI to verify the Mounted Drives in the Hardware section of the VM
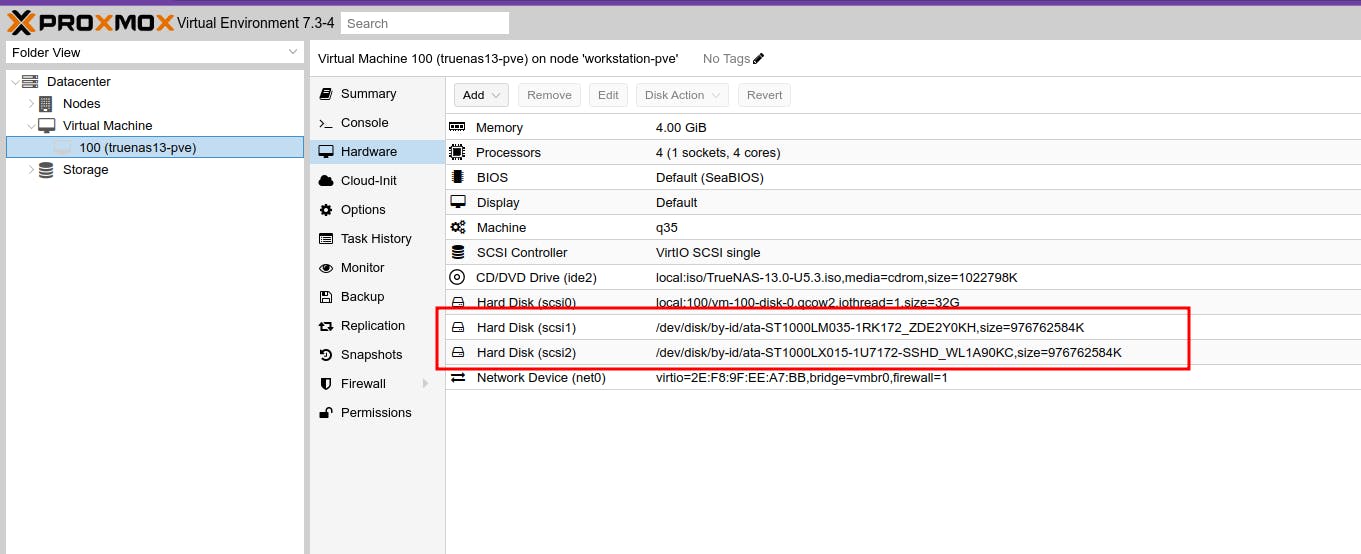
This gives our TrueNAS VM access to Drives.
Stage 3 - Passing through PCI Drives, NIC and graphic card in Proxmox for TrueNAS
IOMMU or VT-d (Optional - Follow only if you want to experience full virtualization support )
If you want to "pass" the graphics card or other PCI device to a virtual machine running on your Proxmox server (virtualization server), you should enable IOMMU (or VT-d for Intel) in the motherboard BIOS of your server.
I have an Nvidia RTX 3060 Ti in my setup which I will be passing through for my Windows VM.
This technology allows you to:
to pass a PCI device to an HVM (hardware or virtual machine hardware-assisted virtualization) virtual machine
isolates I/O and memory accesses to prevent DMA attacks on the physical server hardware.
Verifying IOMMU parameters
Verify that IOMMU is enabled
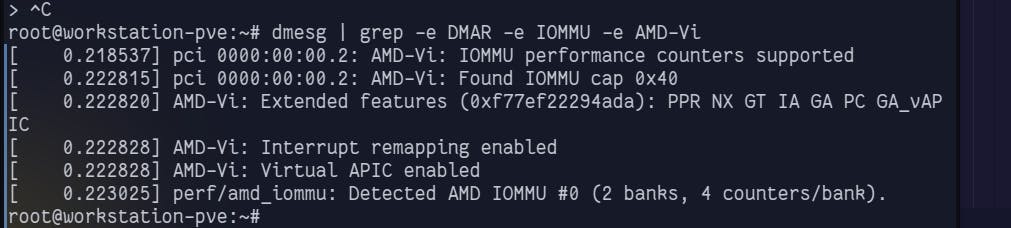
Reboot, then run:
dmesg | grep -e DMAR -e IOMMU
There should be a line that looks like "DMAR: IOMMU enabled". If there is no output, something is wrong.
Verify that IOMMU interrupt remapping is enabled
It is not possible to use PCI passthrough without interrupt remapping. Device assignment will fail with 'Failed to assign device "[device name]": Operation not permitted' or 'Interrupt Remapping hardware not found, passing devices to unprivileged domains is insecure.'.
All systems using an Intel processor and chipset that have support for Intel Virtualization Technology for Directed I/O (VT-d), but do not have support for interrupt remapping will see such an error. Interrupt remapping support is provided in newer processors and chipsets (both AMD and Intel).
To identify if your system has support for interrupt remapping:
dmesg | grep 'remapping'
If you see one of the following lines:
AMD-Vi: Interrupt remapping enabledDMAR-IR: Enabled IRQ remapping in x2apic mode('x2apic' can be different on old CPUs, but should still work)
then remapping is supported.
If your system doesn't support interrupt remapping, you can allow unsafe interrupts with:
echo "options vfio_iommu_type1 allow_unsafe_interrupts=1" > /etc/modprobe.d/iommu_unsafe_interrupts.conf
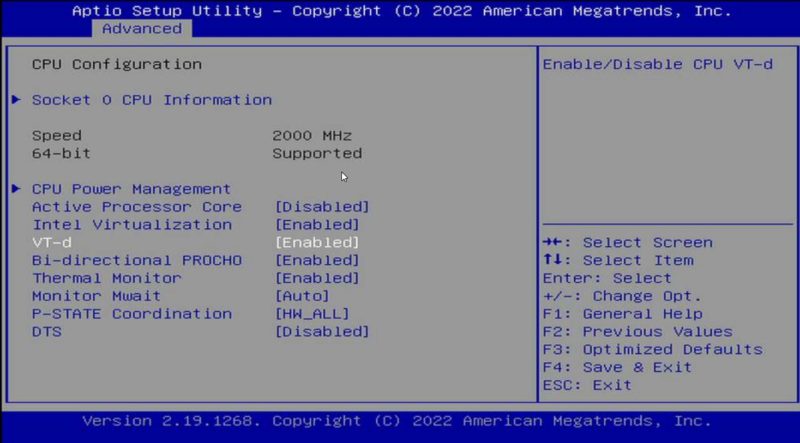
- BIOS Setup
The first thing one needs to do is to turn on the IOMMU feature on your system. For this, the CPU and the platform need to support the feature. These days, most platforms will support IOMMU, but some older platforms do not. On Intel platforms, this is called “VT-d”. That stands for Intel Virtualization Technology for Directed I/O (VT-d.) Below is the screenshot for reference, yours might differ.
Enable IOMMU using GRUB
If you have GRUB, and most installations today will, then you will need to edit your configuration file:
nano /etc/default/grub
For Intel CPUs add quiet intel_iommu=on:
GRUB_CMDLINE_LINUX_DEFAULT="quiet intel_iommu=on"
For AMD CPUs add quiet amd_iommu=on:
GRUB_CMDLINE_LINUX_DEFAULT="quiet amd_iommu=on"
Here is a screenshot with the AMD line to show you where to put it:

Remember to save and exit.
Now we need to update GRUB:
update-grub
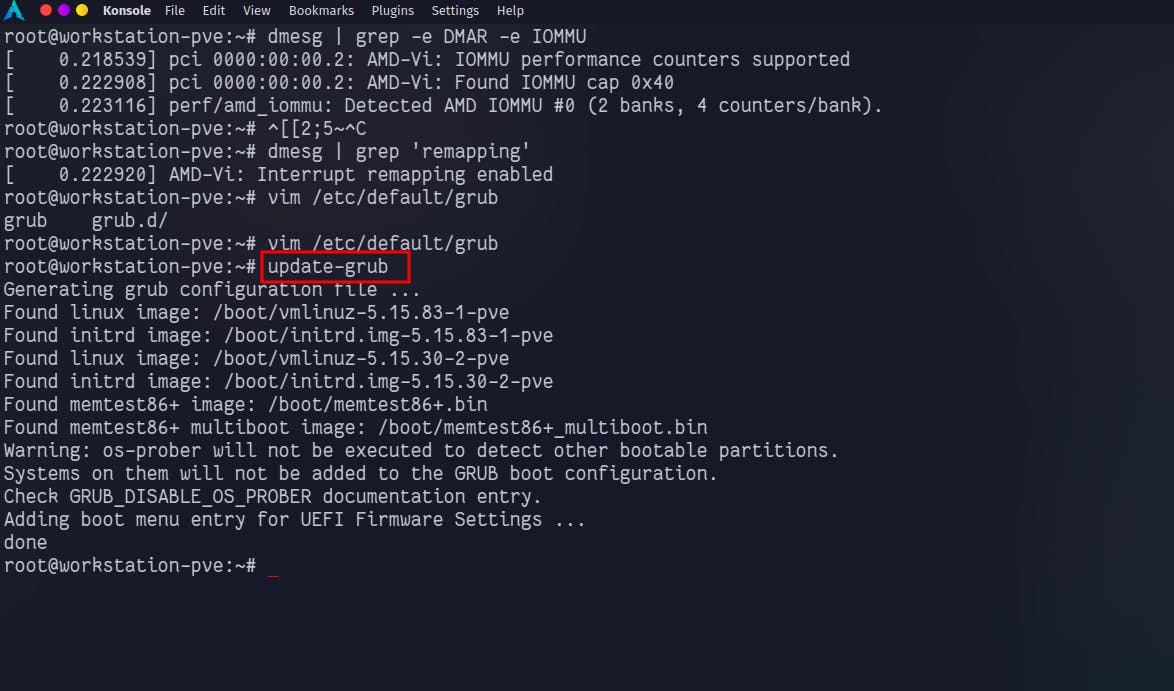
Reboot the system to take effect. Post-boot PCI drives and Graphics cards should be visible under the hardware section of VMs.
Optional :
- There is a more advanced feature called SR-IOV that allows you to pass through a NIC to multiple devices. You will be conceptually dedicating the NIC to the VM. That means, another VM cannot use the NIC. The Proxmox VE GUI will allow you to configure pass-through on VMs.
Reference: https://en.wikipedia.org/wiki/Input%E2%80%93output_memory_management_unit
Stage 4 - Setup and Configure TrueNAS Scale server
- Installation - TrueNAS Server
Power on the VM and you will be presented with the following screen in the console.

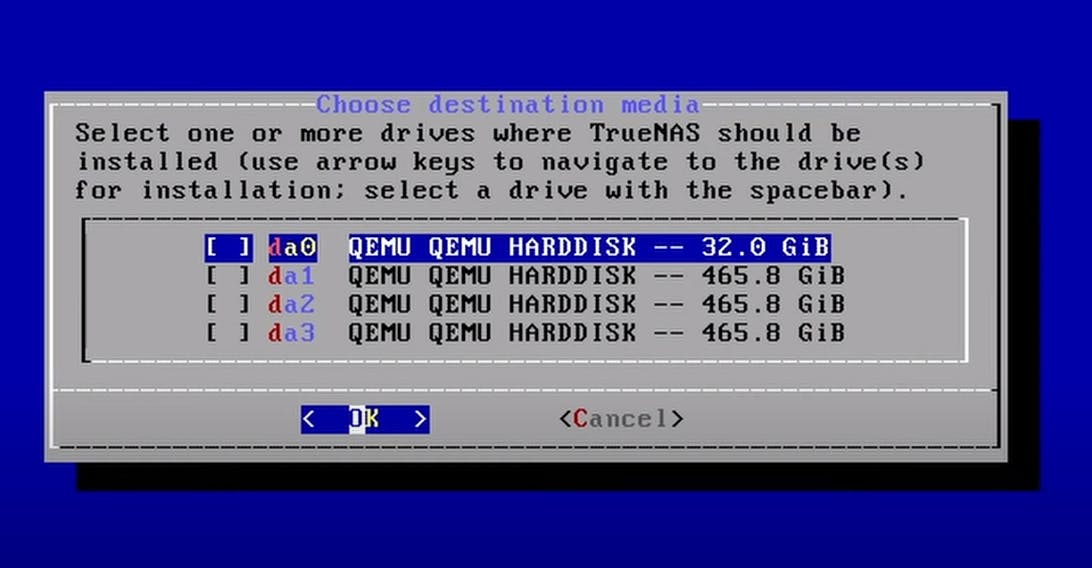
Select the Install / Upgrade option.
Select the 32GB drive that we assigned for OS in the VM Disk setup section.
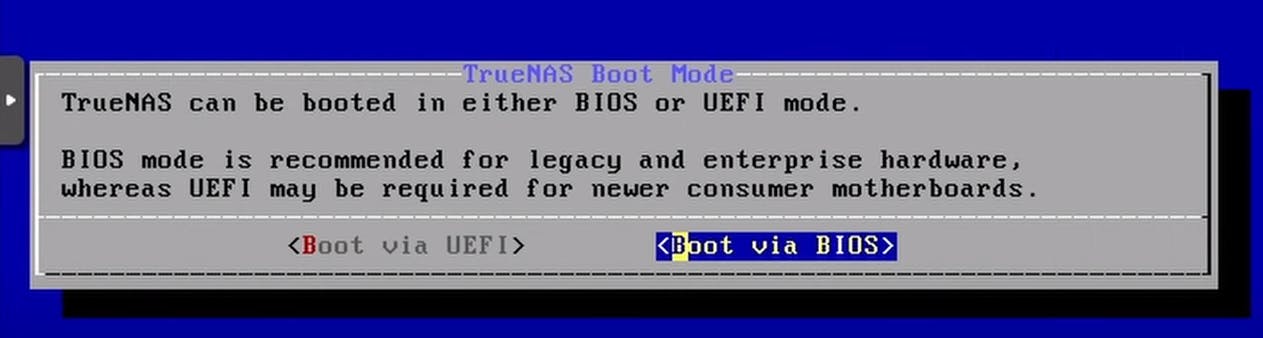
Boot mode selection
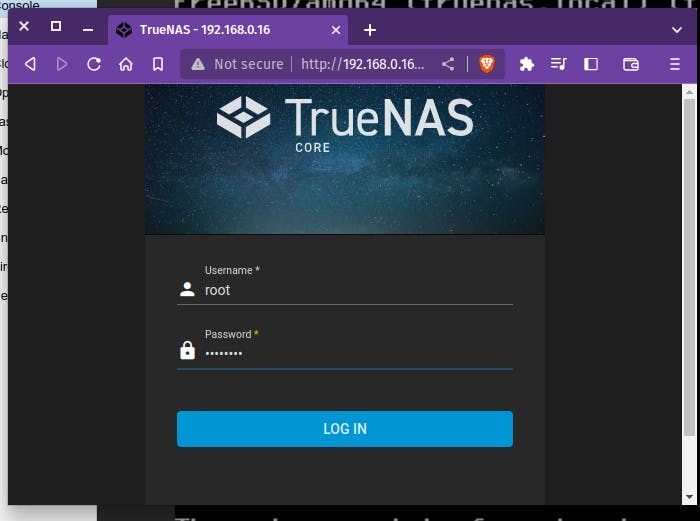
Access using Web Interface - Refer IP address mentioned in the screenshot.
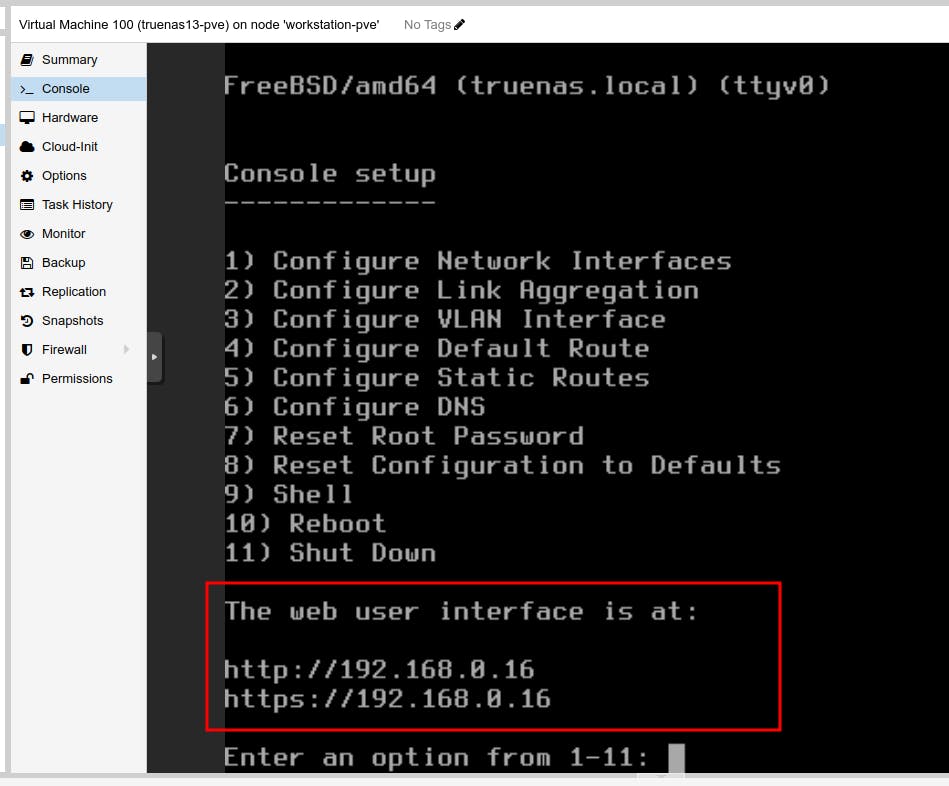
Access the TrueNAS Web UI - Enter the creds you entered at the time of Installation.
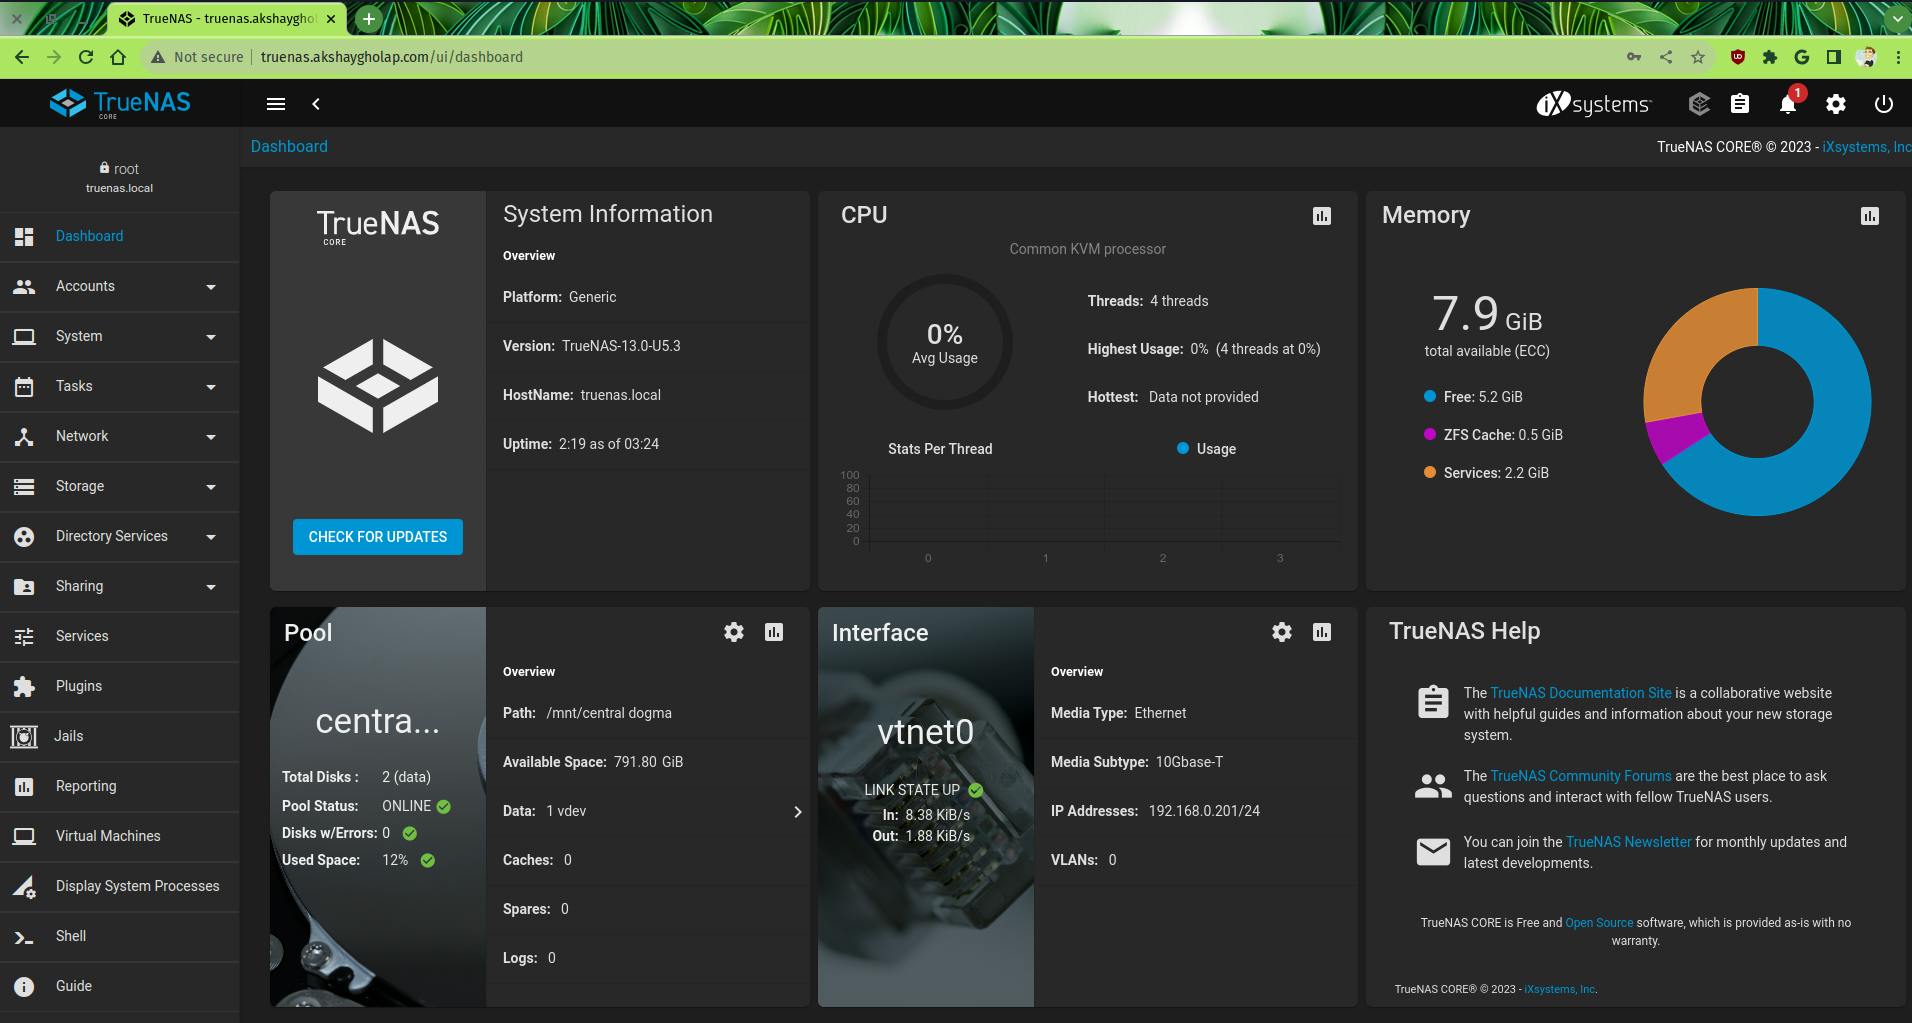
TrueNAS Interface
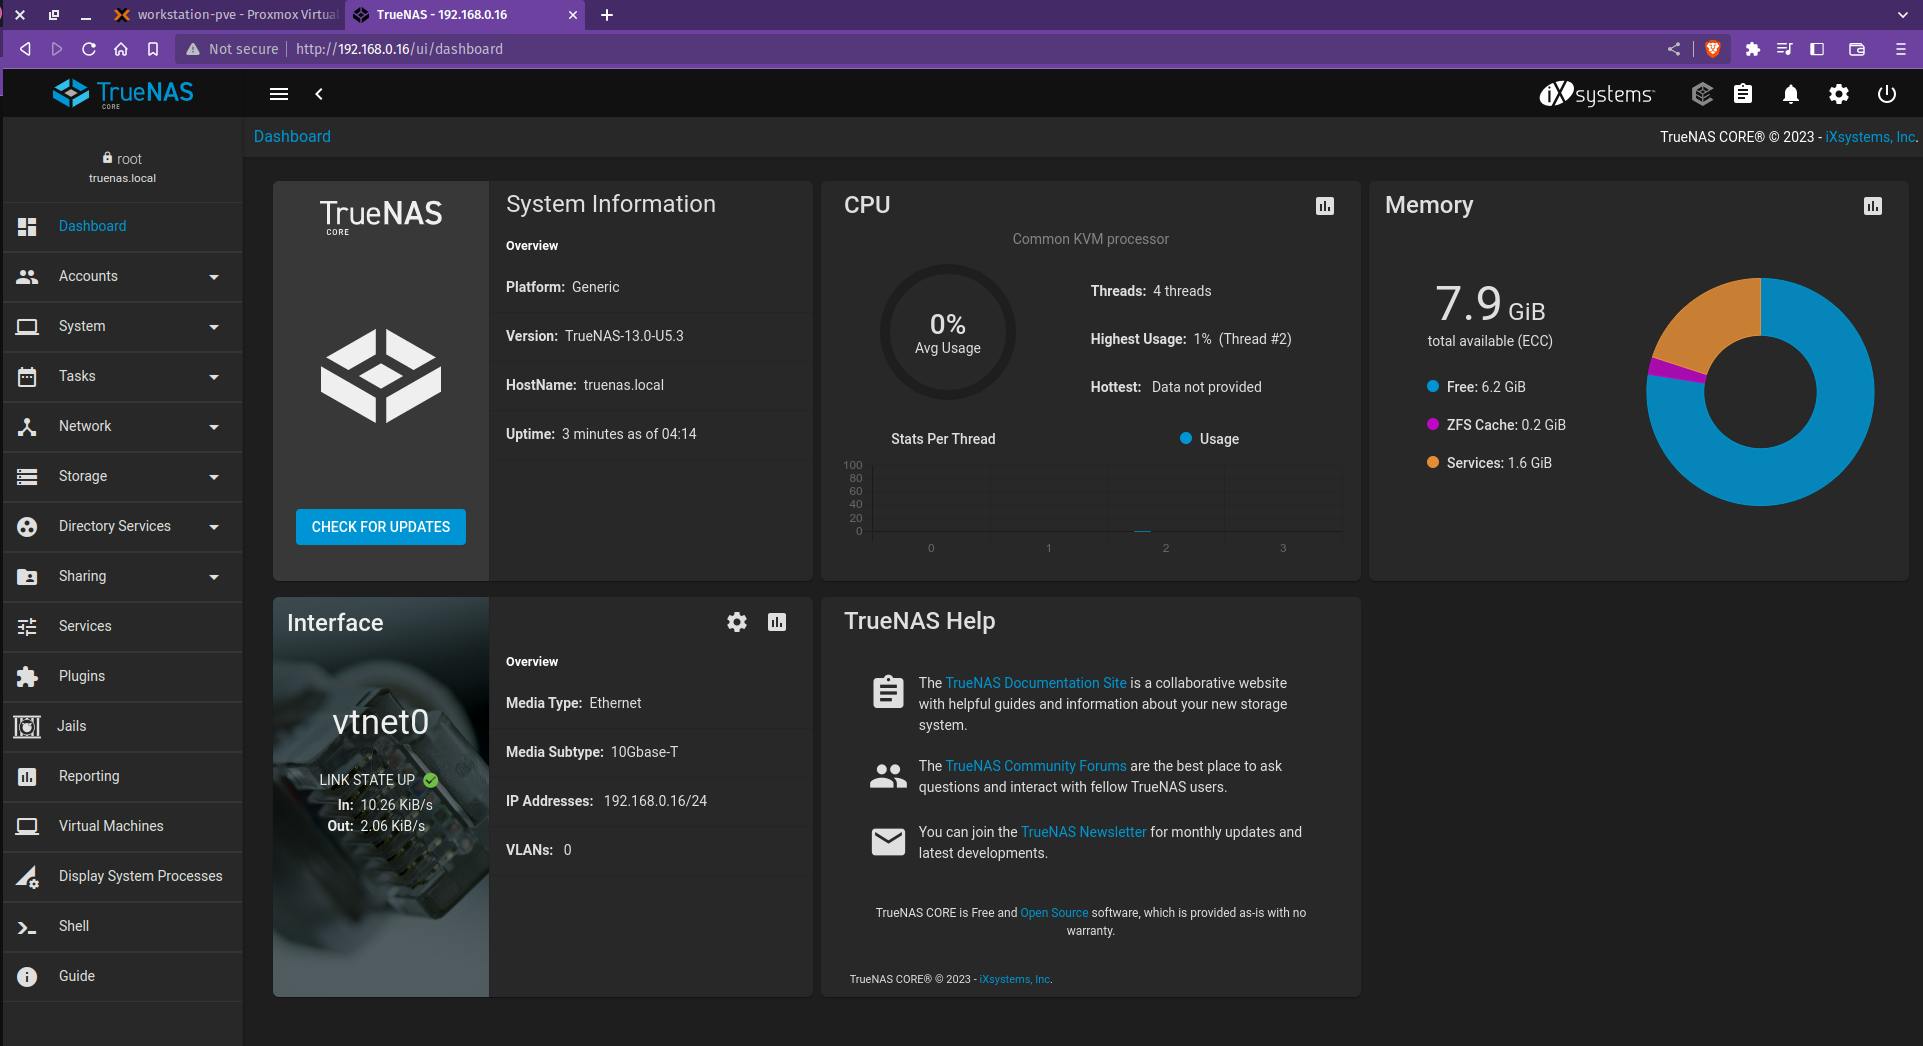
This completes the TrueNAS scale server setup. Proceed with the NAS setup now.
Stage 5 - Creating Samba share or Configure iSCSI Block storage
Unlike other sharing protocols on TrueNAS, an iSCSI share allows block sharing and file sharing. Block sharing provides the benefit of block-level access to data on the TrueNAS. iSCSI exports disk devices (zvols on TrueNAS) over a network that other iSCSI clients (initiators) can attach and mount.
Samba Share Setup
Create a Storage Pool for NAS - Select Storage > Pool > Create New Pool
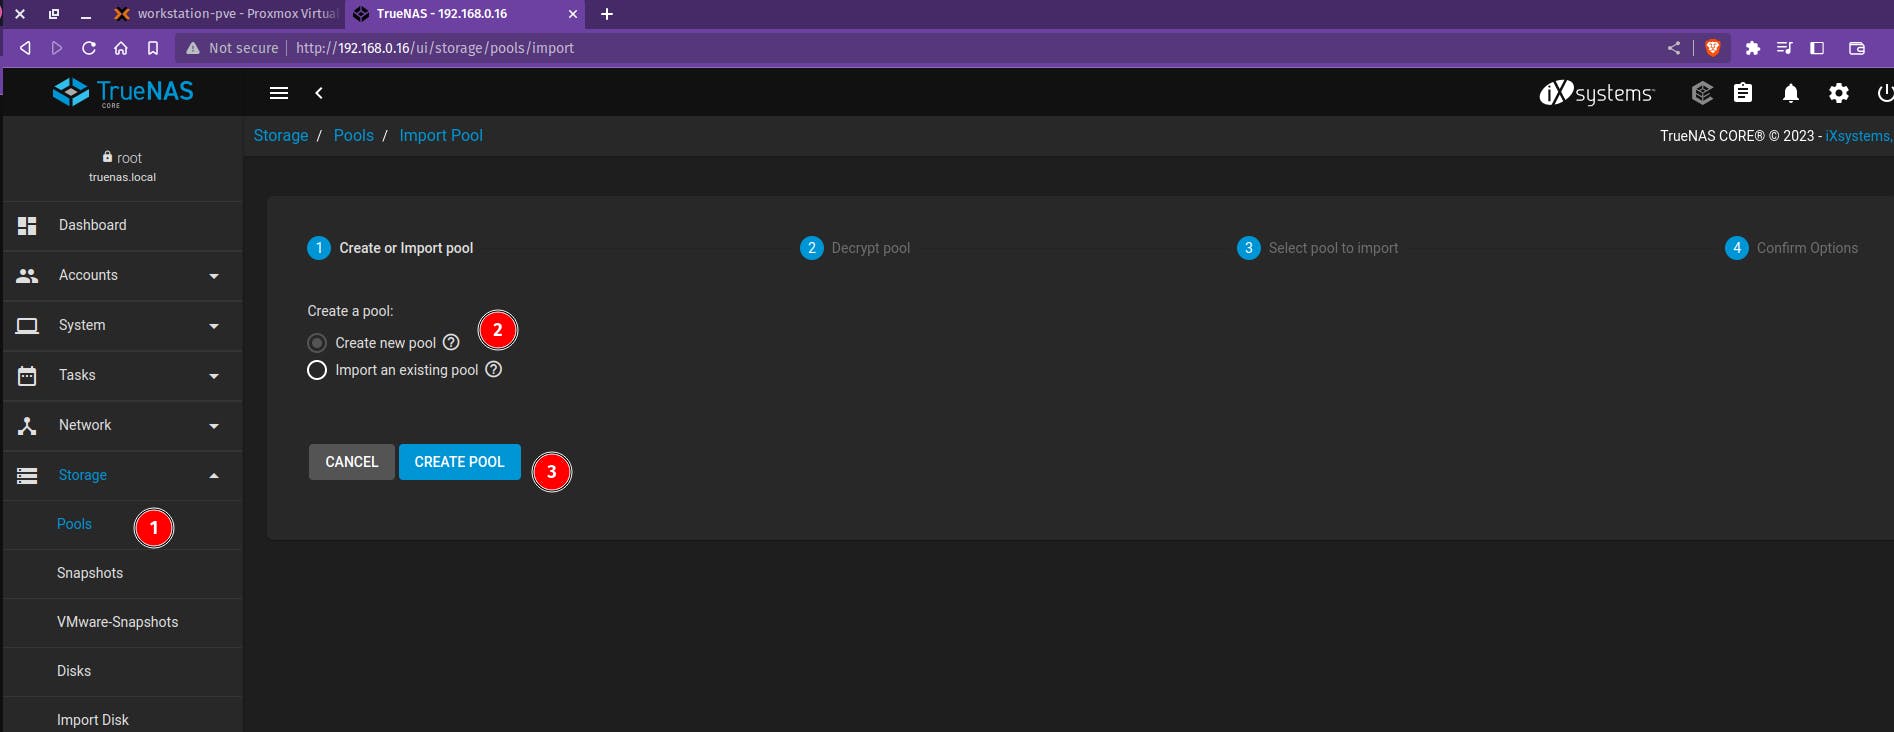
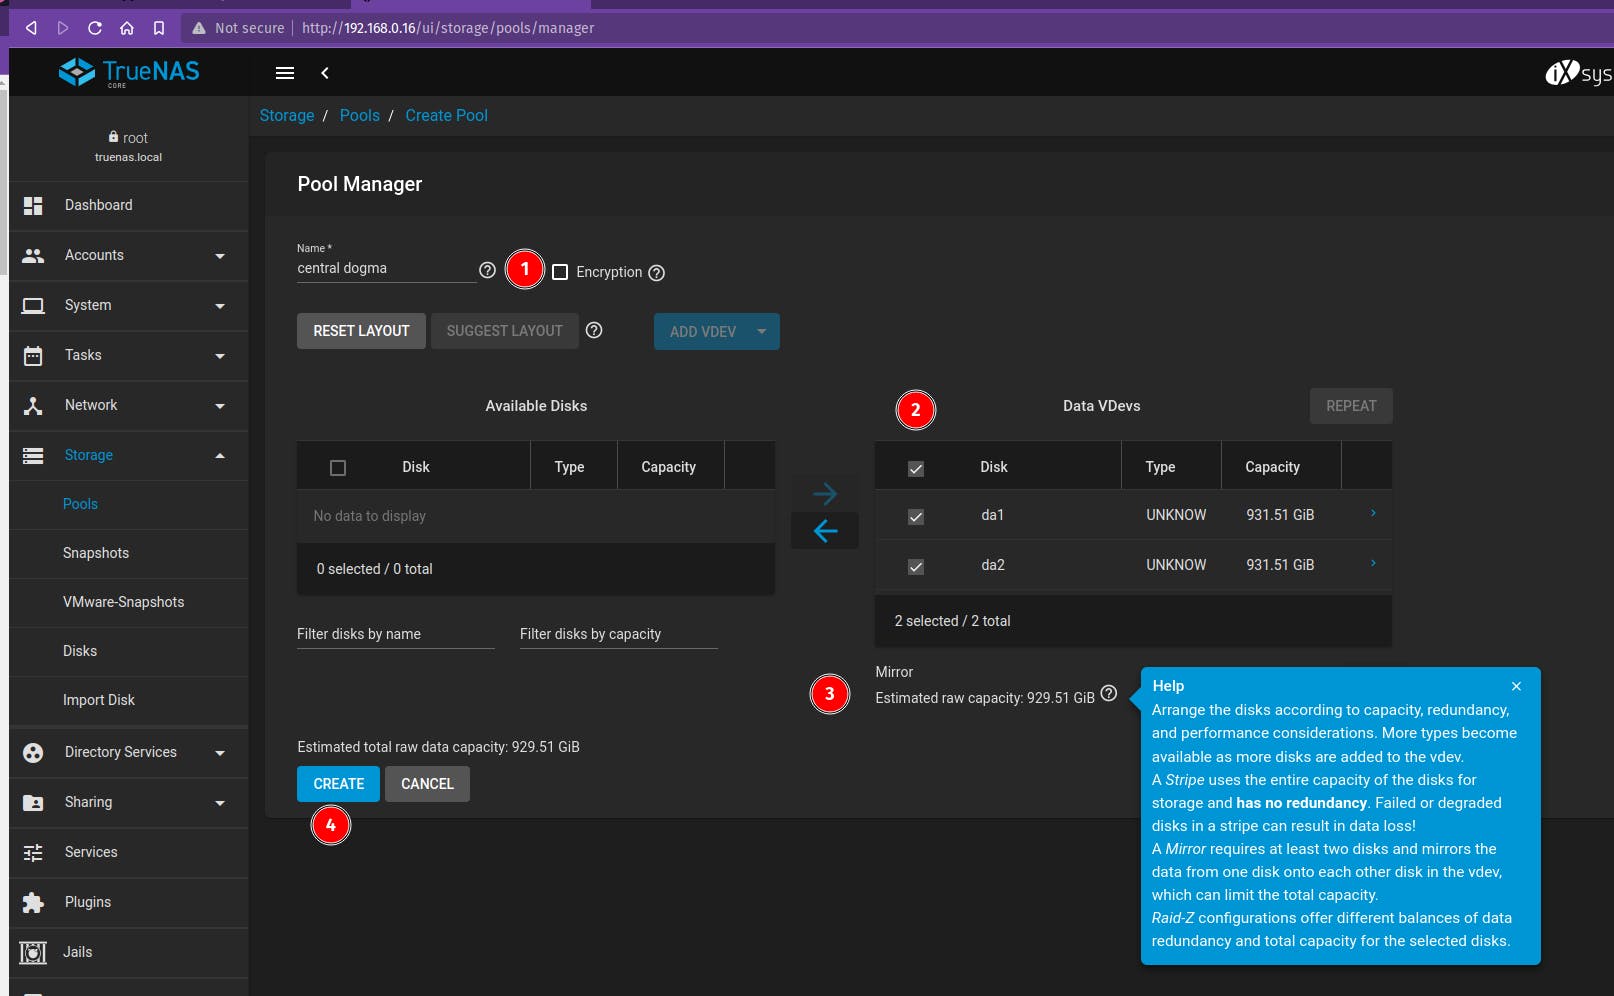
Select the disk that we need for NAS setup and give a name to your Pool.
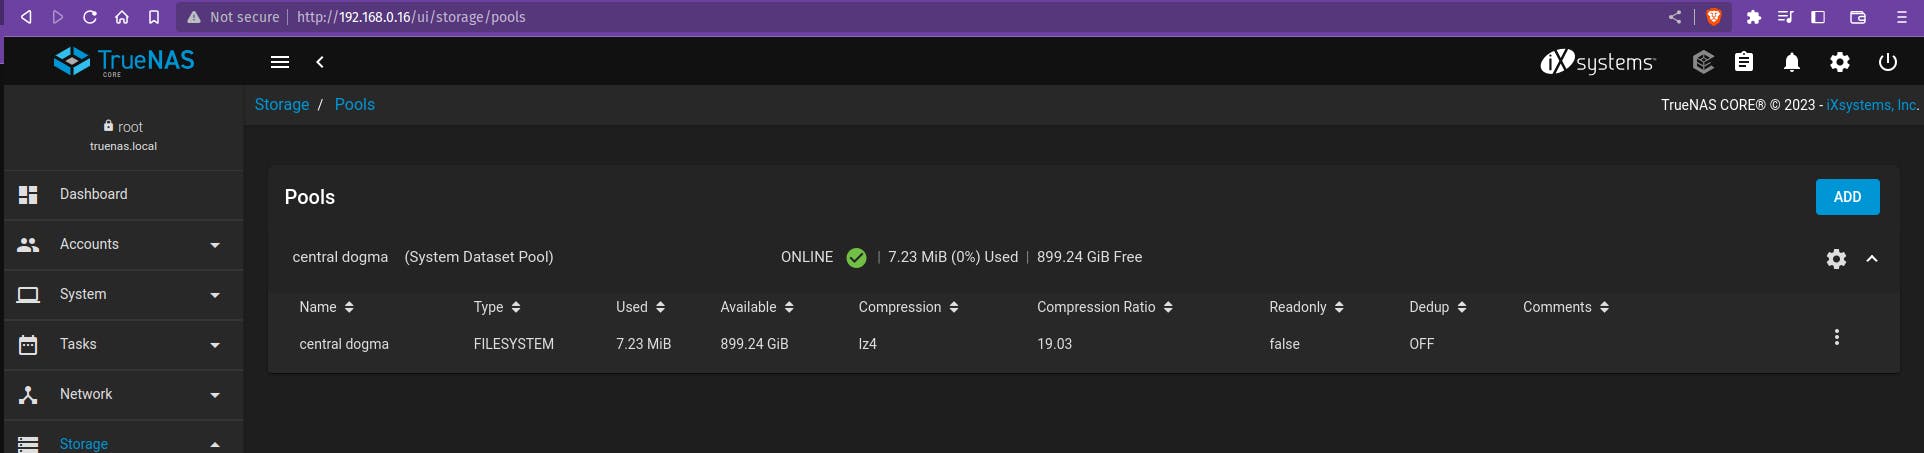
In this case, it is "central dogma" and click on create.
Your Pool should look like this
Once you create a pool click on the ADD button to add the Dataset for SMB share
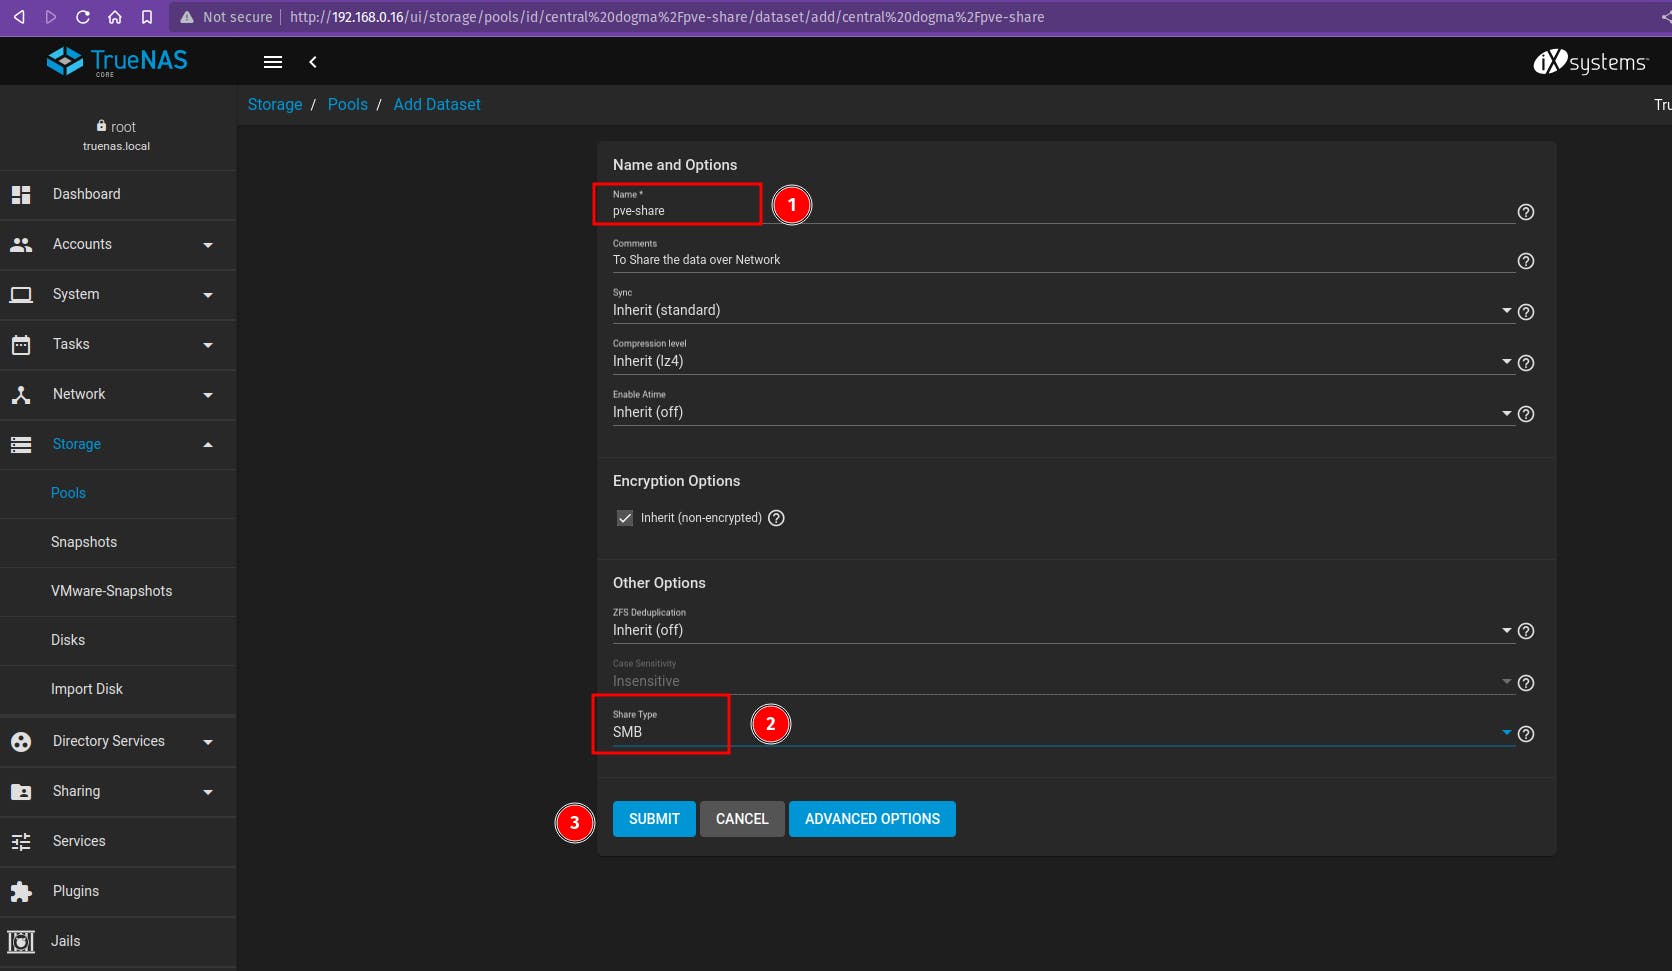
Click on the Sharing tab on the Left panel > Windows SMB.
Select the Pool name that we just created.
Enable sharing for the share with default share parameters.

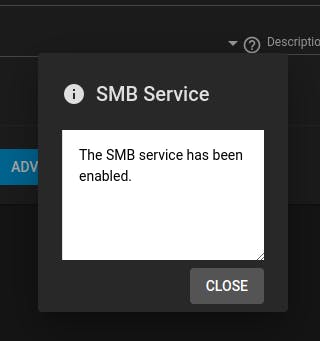
You should get the below screen once the SMB share has been enabled.
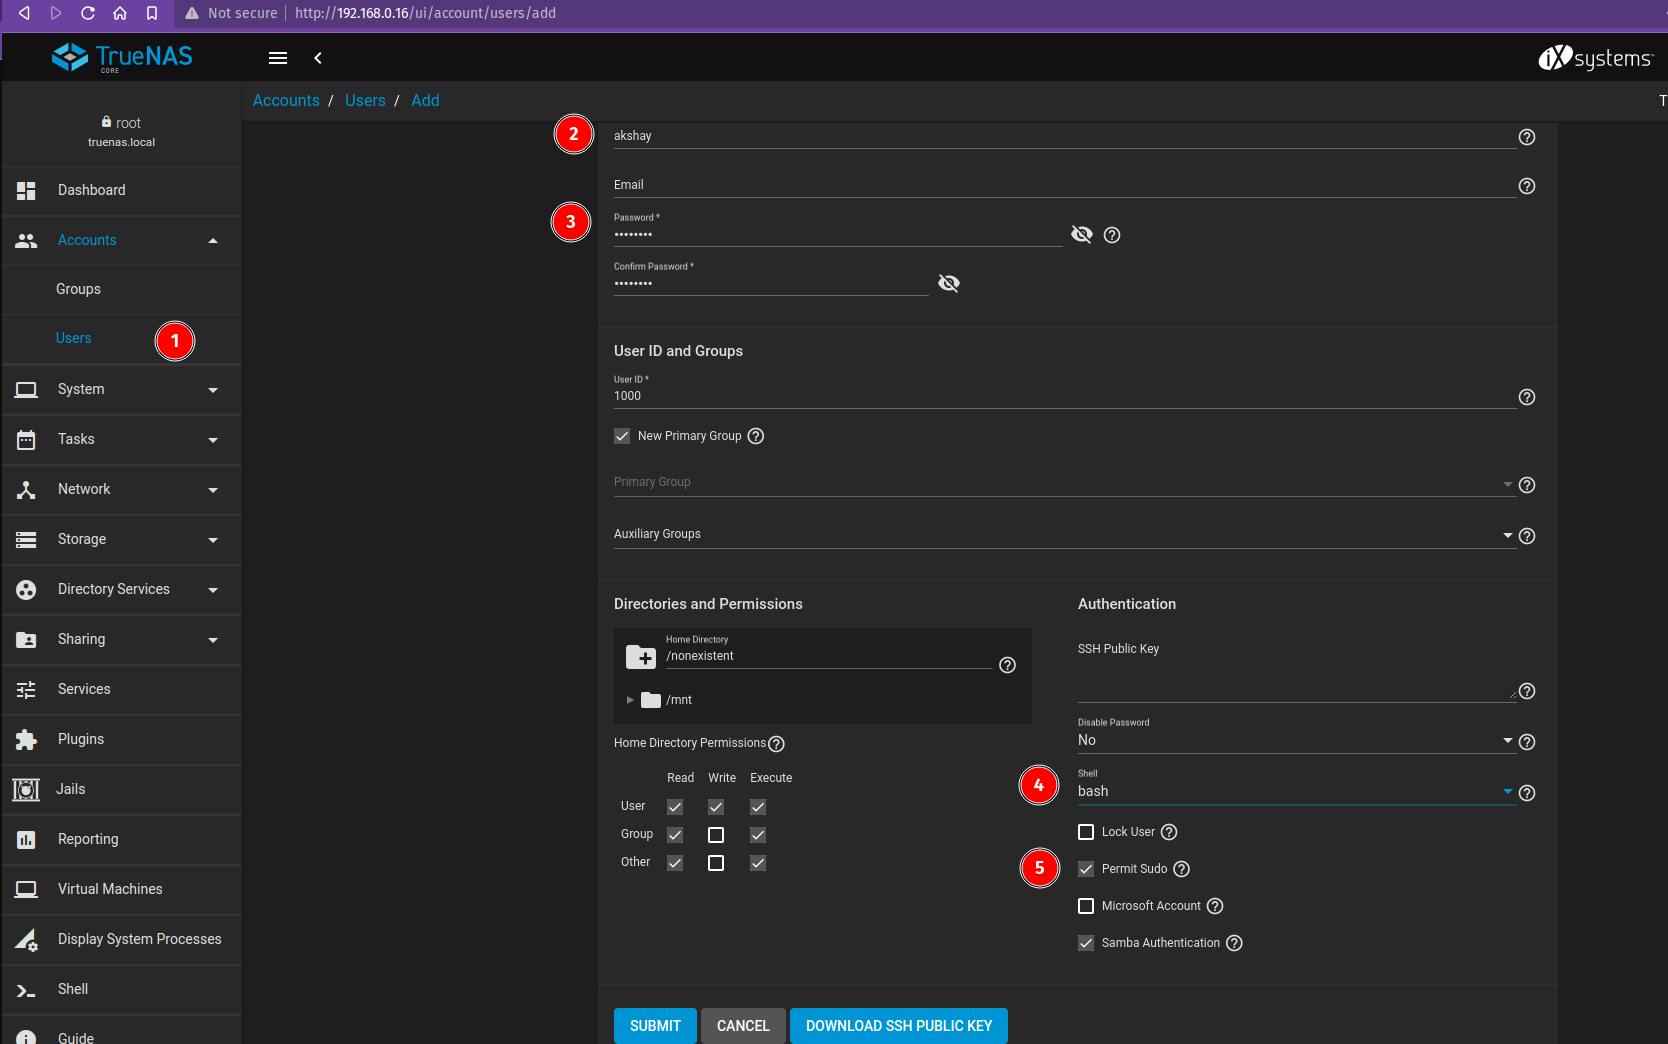
Creating a User for Accessing the SMB Share remotely
Navigate to the Accounts tab on the left panel > Users
Enter username, set password, shell-bash, and set permissions accordingly.
Giving full permission for my share.
Adding our newly created User in Pool Permissions
Head towards the Storage tab > Pool > Edit Permissions for our Pool - "Central dogma"
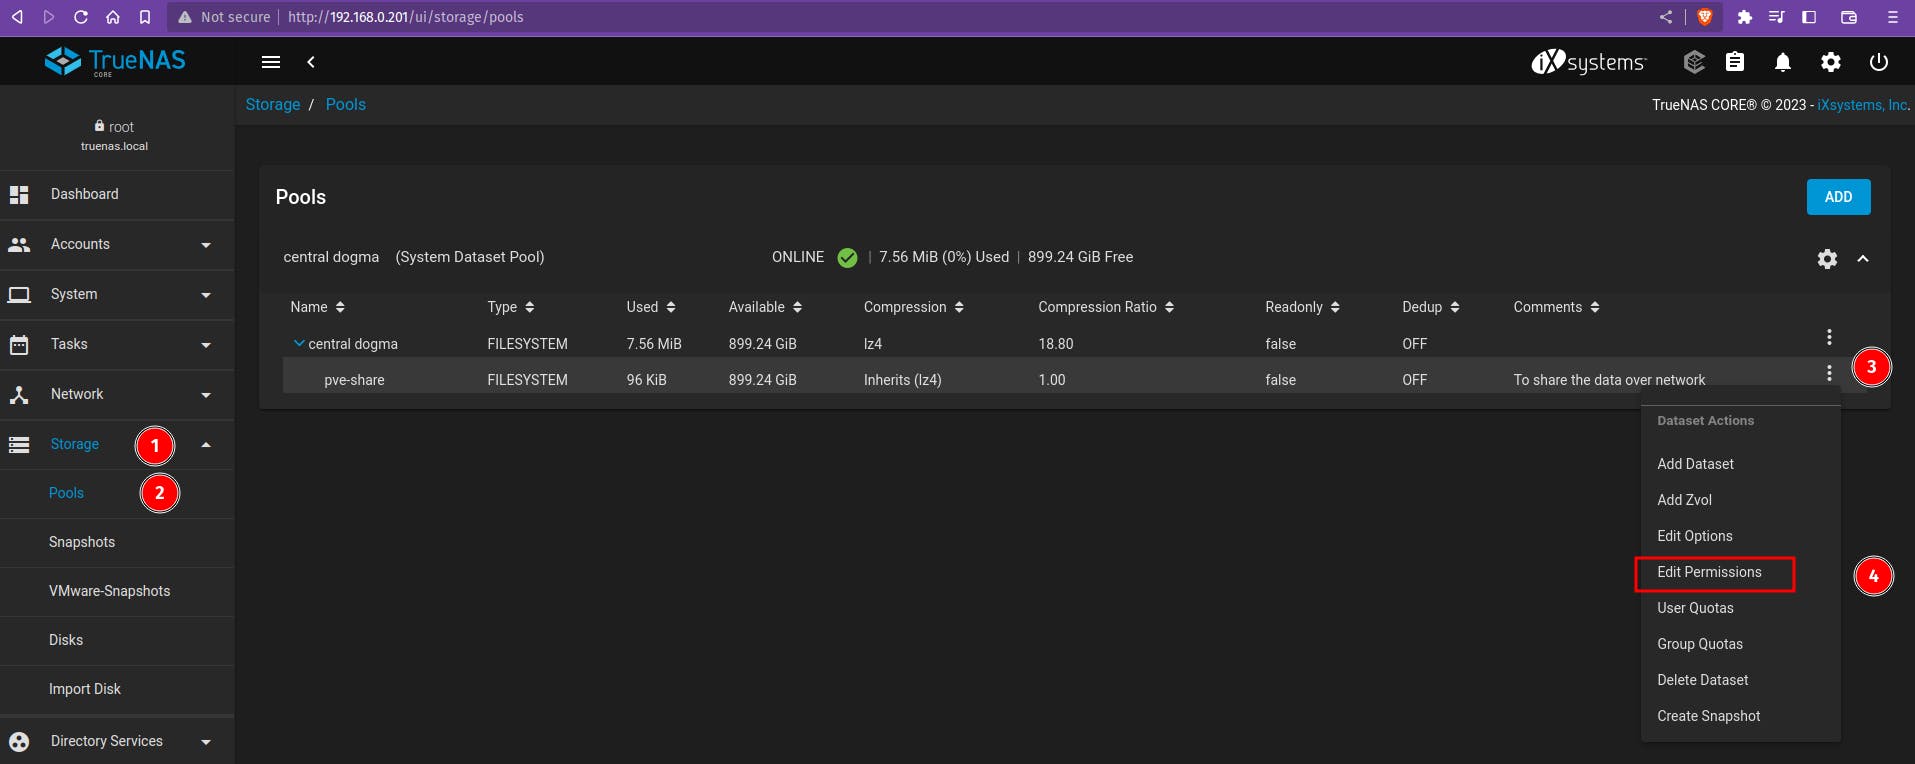
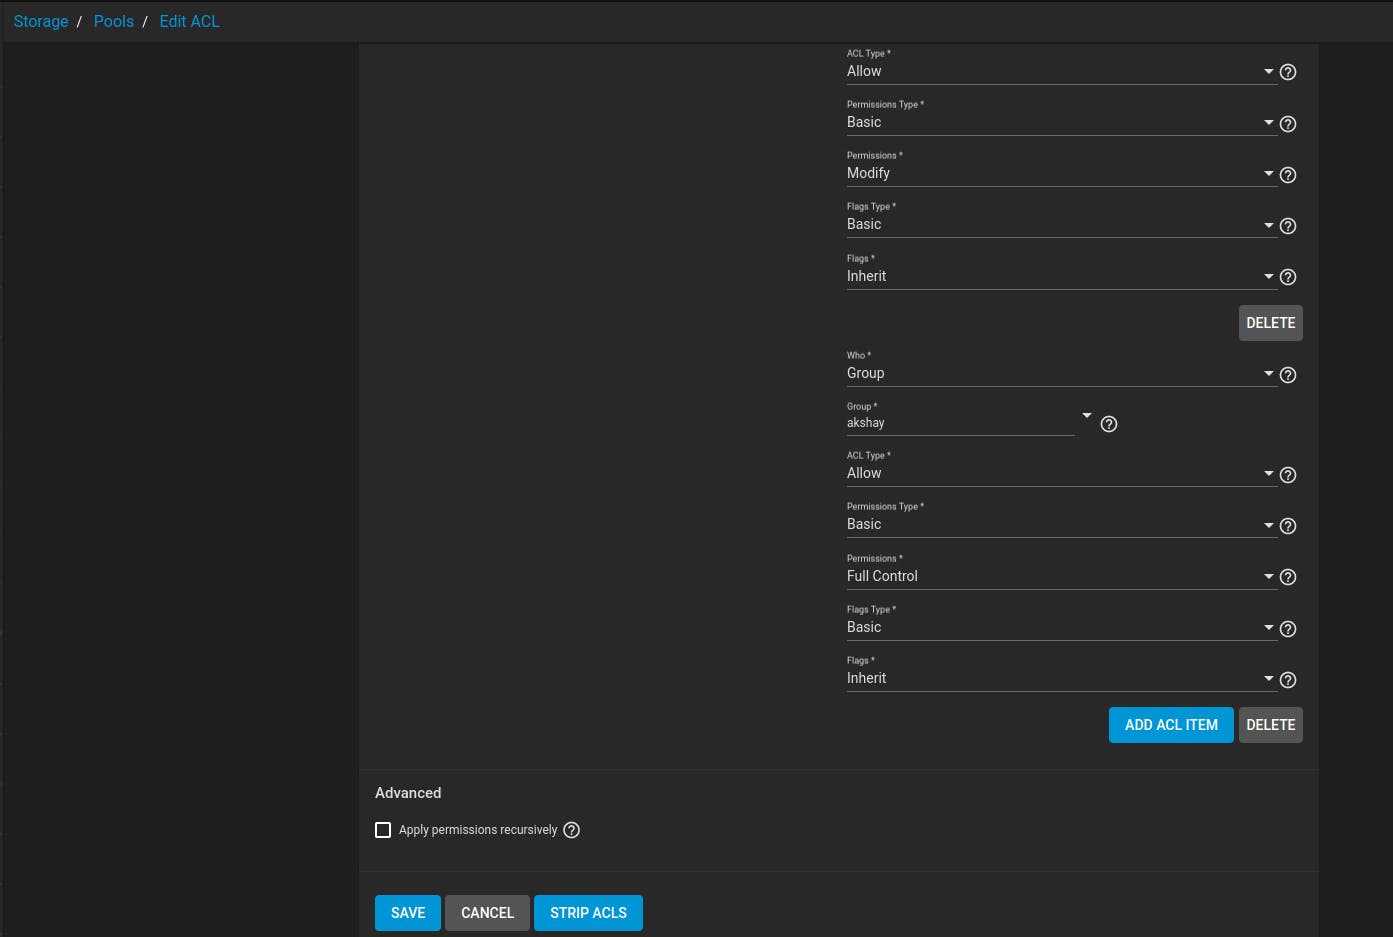
Refer below screenshot and set the permissions for Pool and edit ACL.
Check the group dropdown and select the newly created user.
This completes SMB share setup on true NAS which is making use of two HDD drives as a RAID-1 for data redundancy.
Mountithe SMB share on the Windows PC
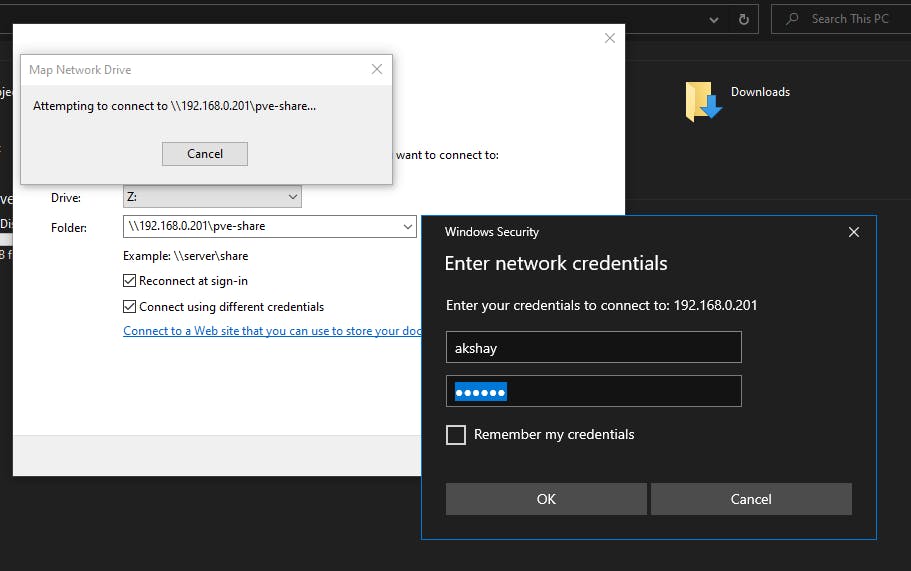
Windows PC in the file explorer, check for the option to connect Map Network Drive.
Enter the details in this format -
\\YOUR_TRUENAS_IP\YOUR_SHARE_NAMEIn my case it is
\\192.168.0.201\pve-share
Click on Finish and it will ask for credentials to connect. use the credentials of the user you created for access to the share.
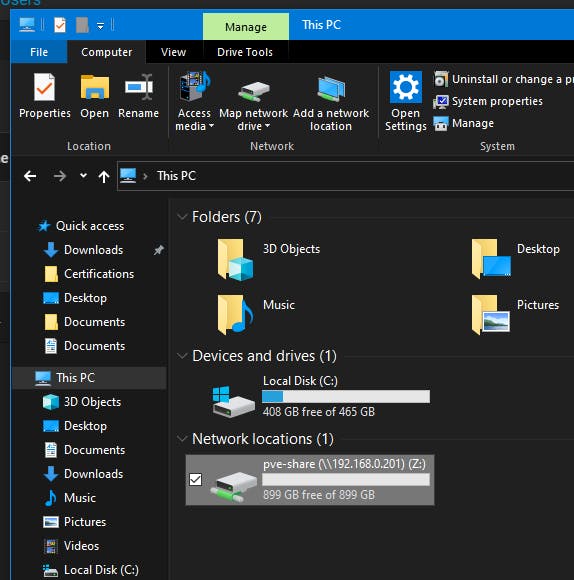
I can see my NAS share mounted in File Explorer. It is 1TB in size which is a RAID-1 of 2 x 1TB Hard Drives.
iSCSI Share Setup
The iSCSI Wizard will help you easily create the block share with its step-by-step configuration. Let’s go ahead and click “Wizard”.
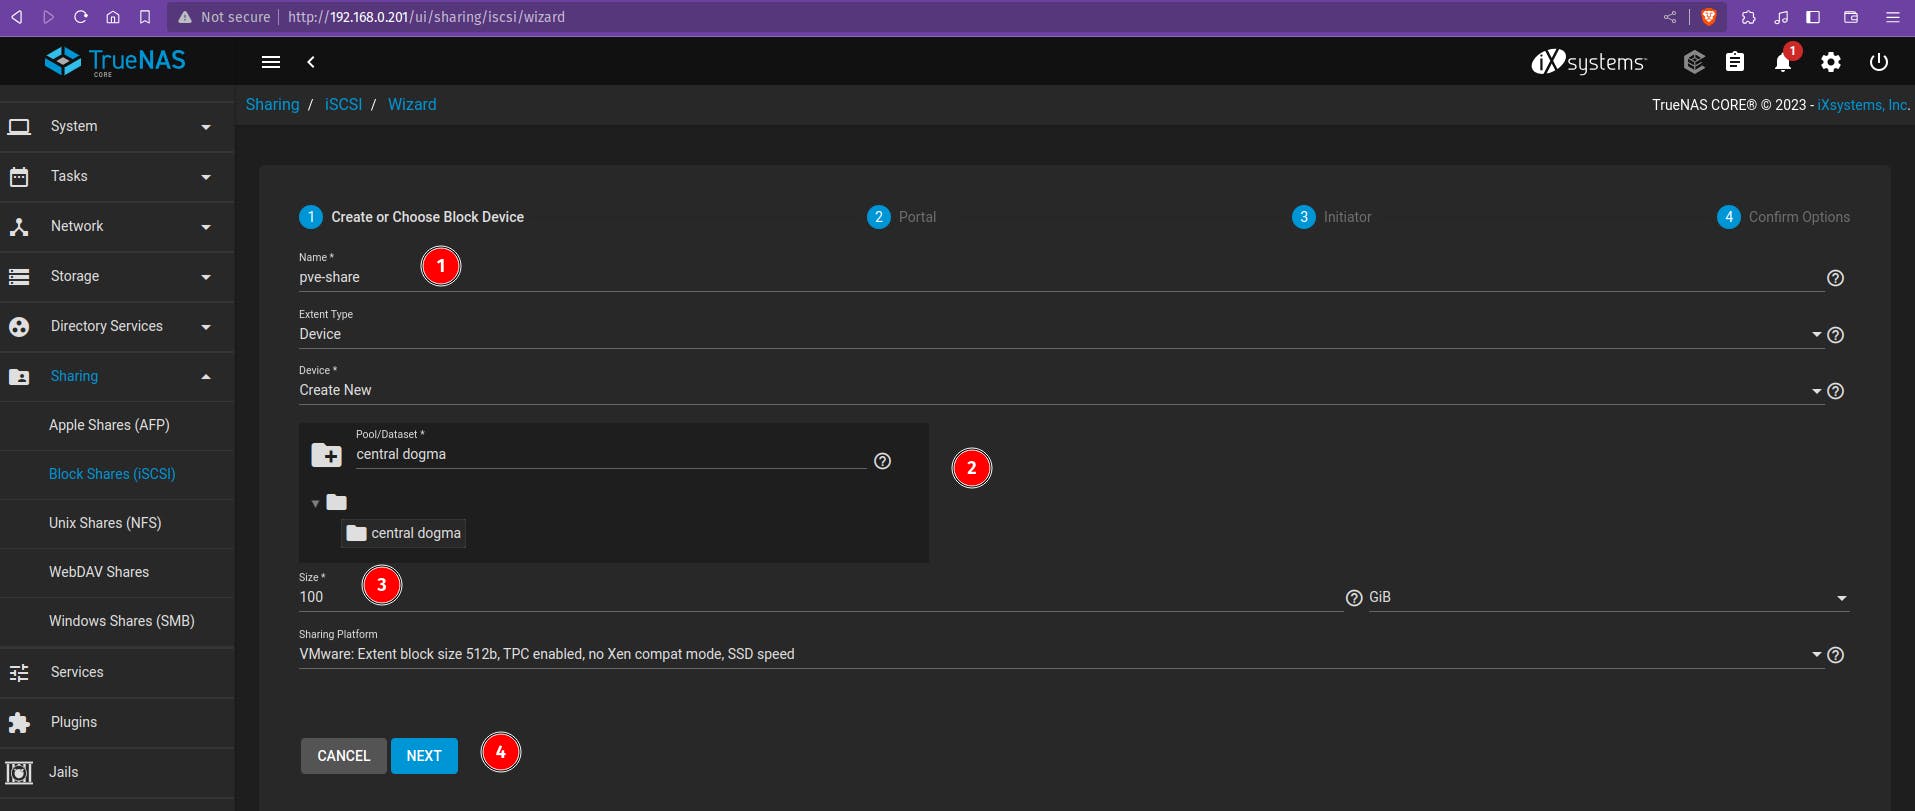
Give your iSCSI share a name.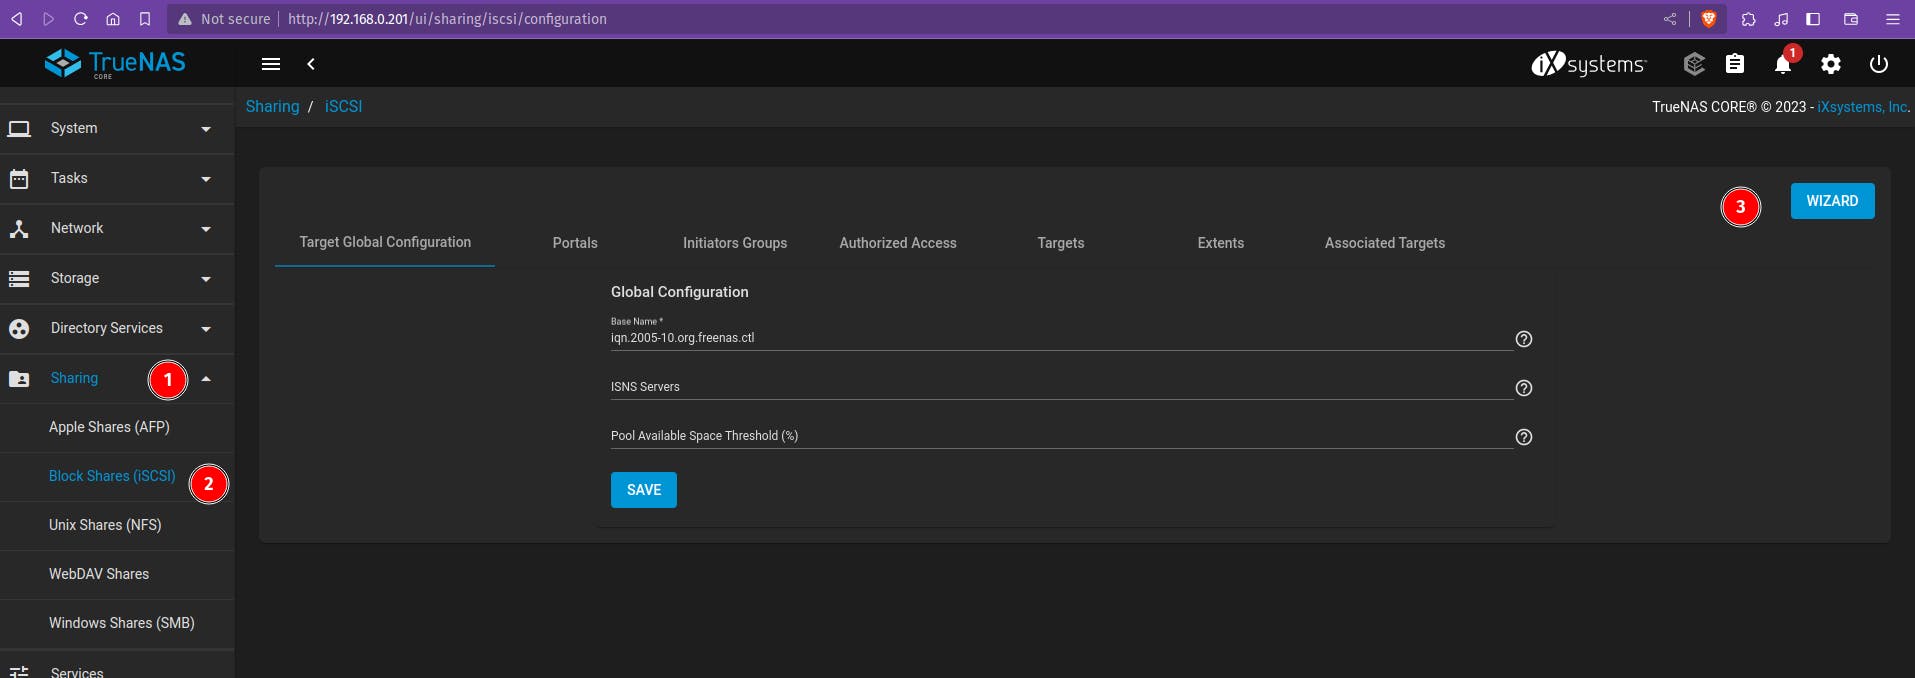
Click “NEXT” to move into the Portal section. Since you don’t have a Portal created yet, the default option is “Create New”.
You can leave the IP as “0.0.0.0” which is the wildcard address of the interface**.**
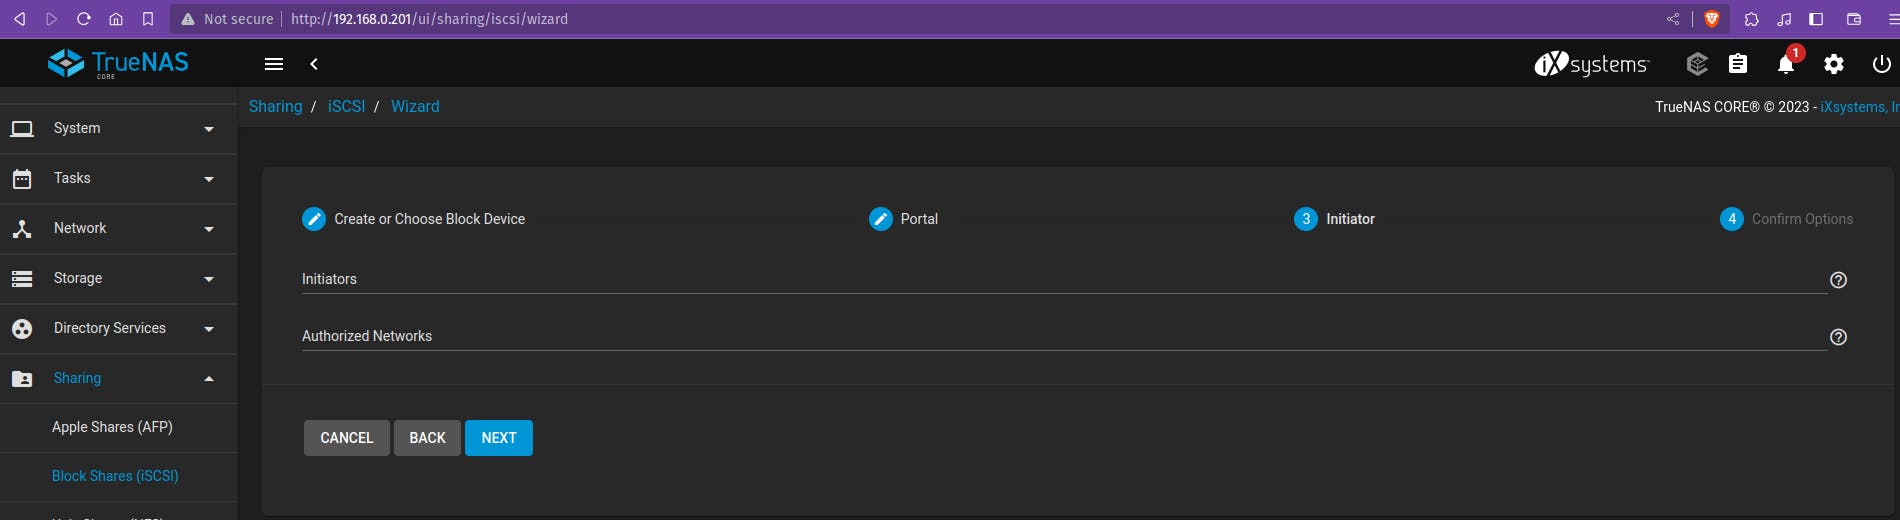
Click “NEXT” to move on to the Initiator section. You can leave the Initiators and Authorized Networks field blank unless you want to limit access to specific initiator clients or IPs on your network.
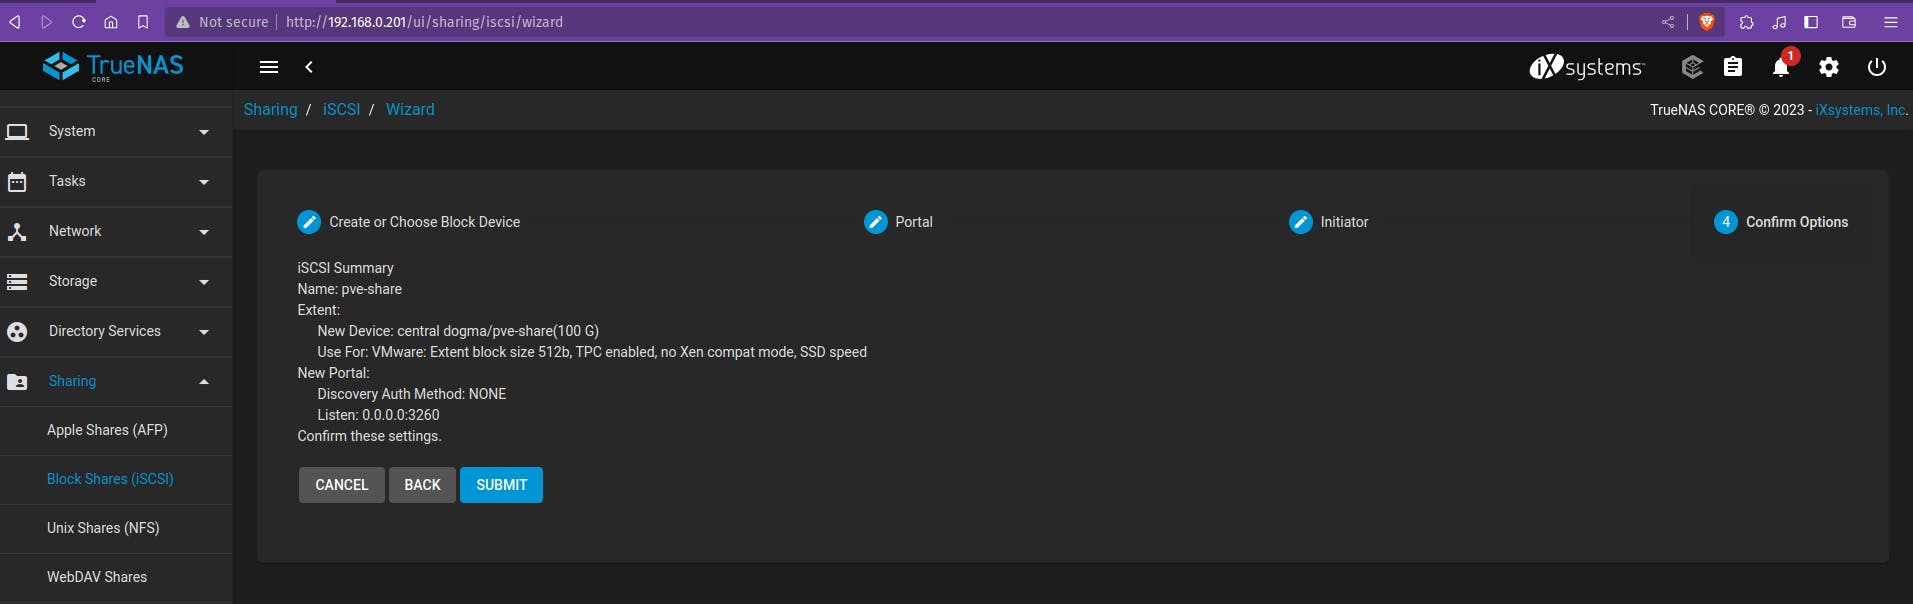
- Click “NEXT” and review your Wizard settings, then “SUBMIT”. The wizard should automatically associate your Extent with your Target
Access Data on iSCSI share from Windows
In order to access the data on the iSCSI share, clients will need to use iSCSI Initiator software. An iSCSI Initiator client is pre-installed in Windows.
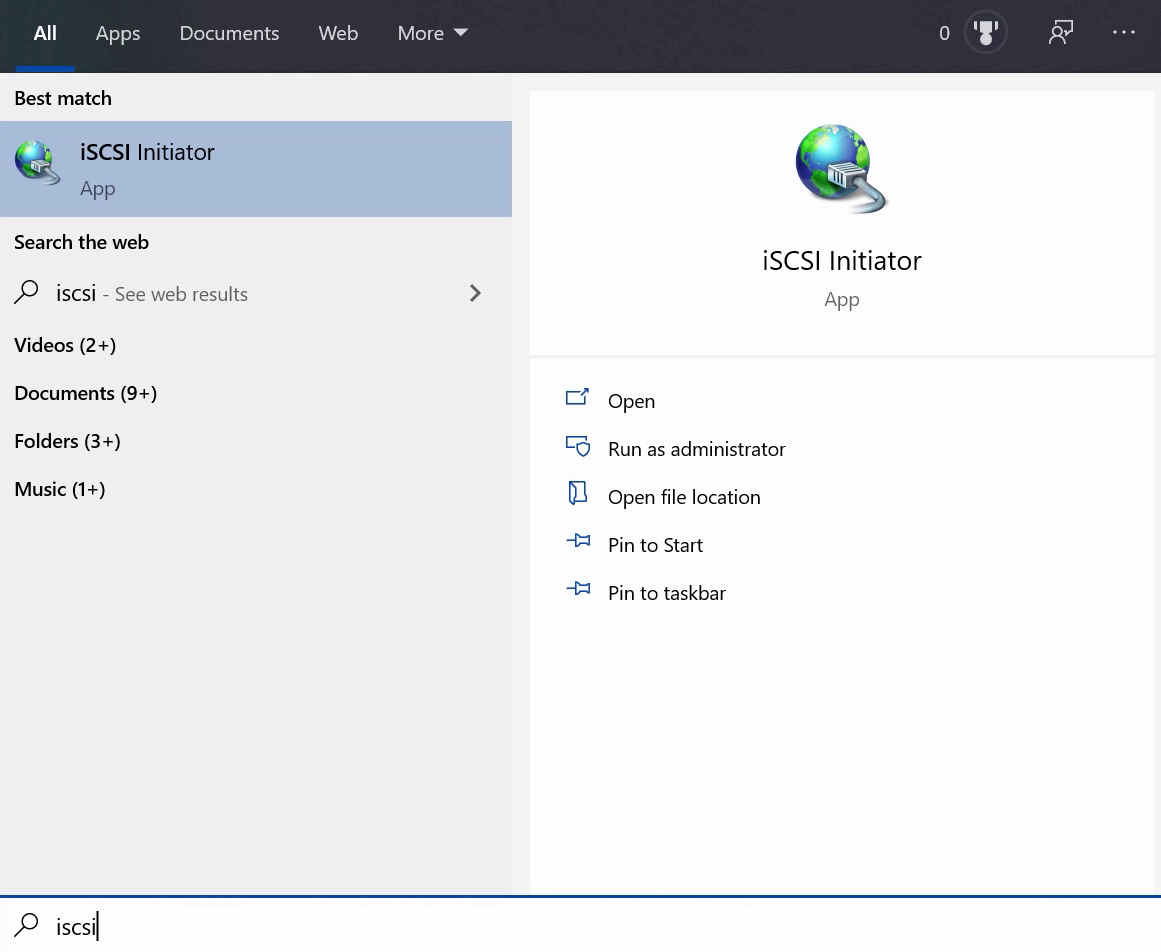
Click the Start Menu and search for the “iSCSI Initiator”.
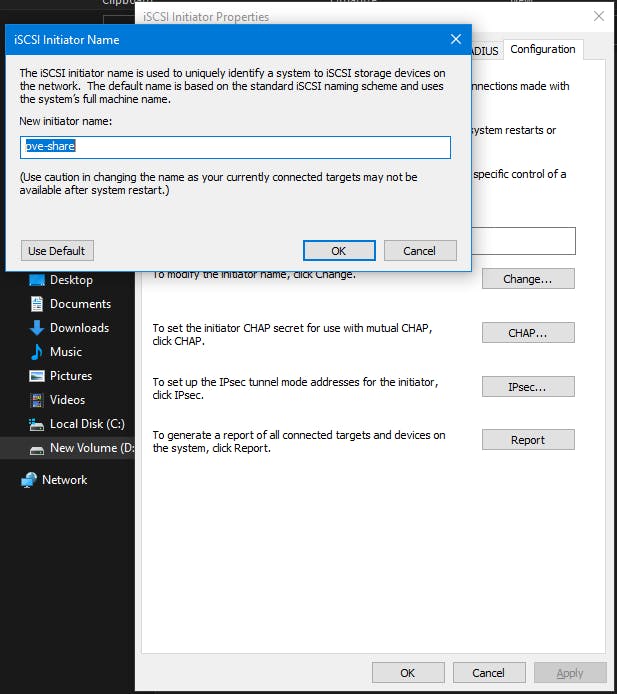
Go to the “Configuration” tab and click “Change” to change the iSCSI initiator to the same name you created earlier, which was “pve-share”
Go to the “Discovery Tab”, proceed to “Discover Portal”, and type in your FreeNAS or TrueNAS IP address. Leave the port at 3260**.**
Go back to “Targets” and click “Connect” on your iSCSI target, then click “OK”.
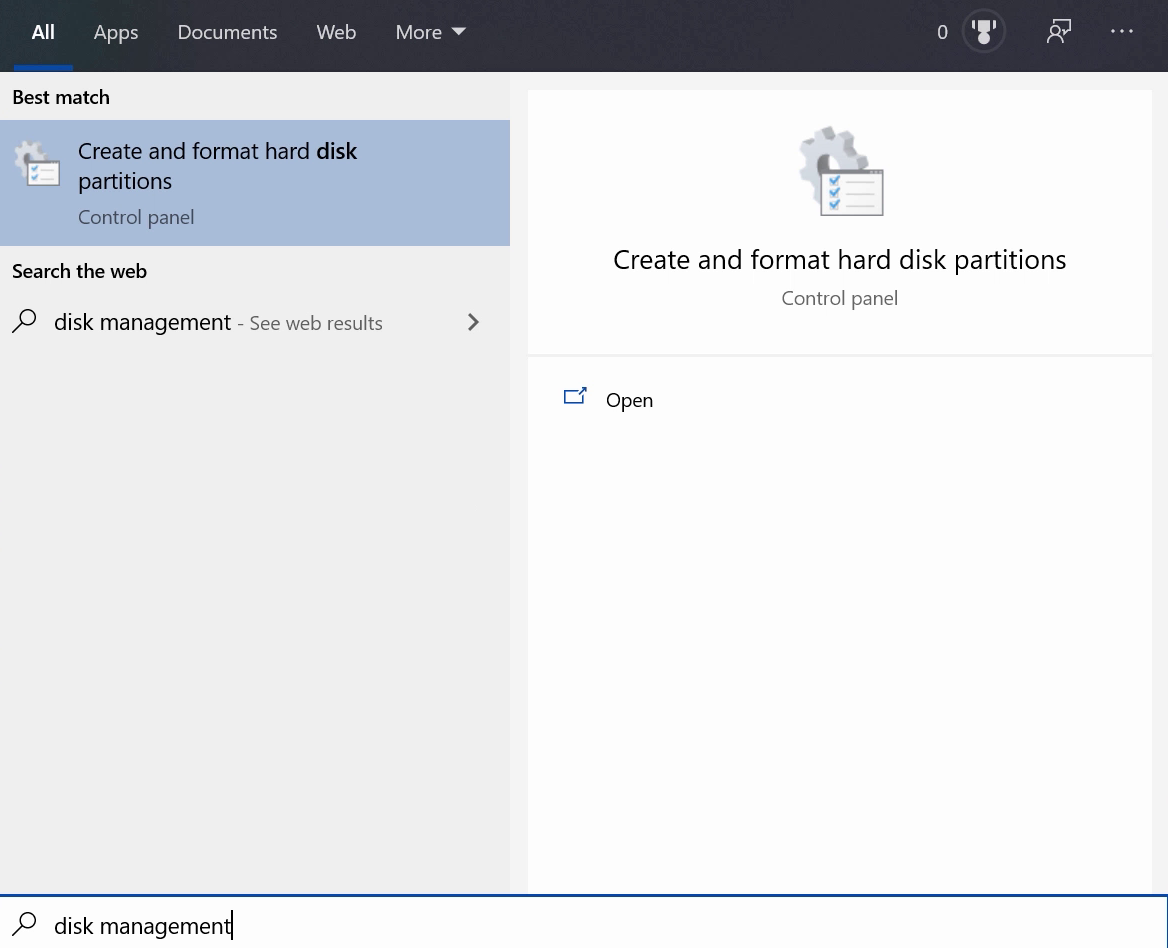
Search for and open the “Disk Management” app in your Control Panel.
A new window will ask you to format the drive. Your drive should currently be ”unallocated”. Complete the Wizard to format it and assign it a drive letter and name.


Initiate newly unallocated partition
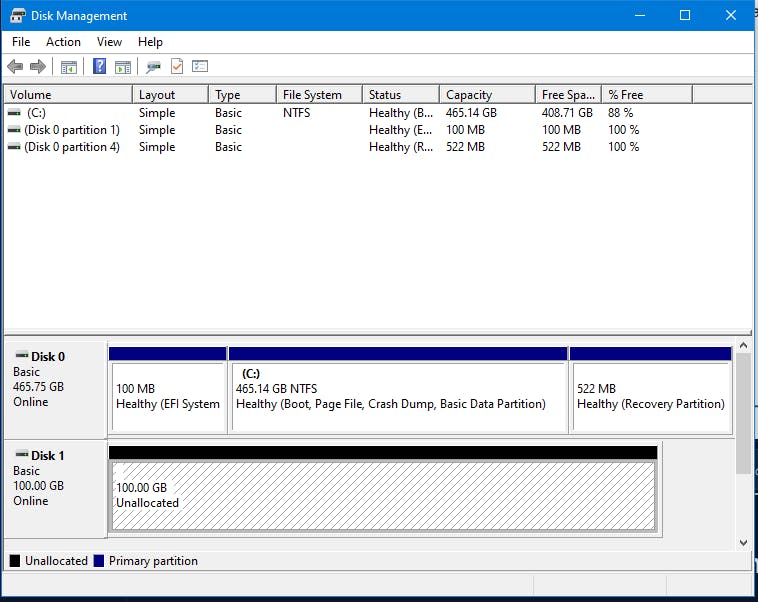
Format the partition as NTFS and give it a name.
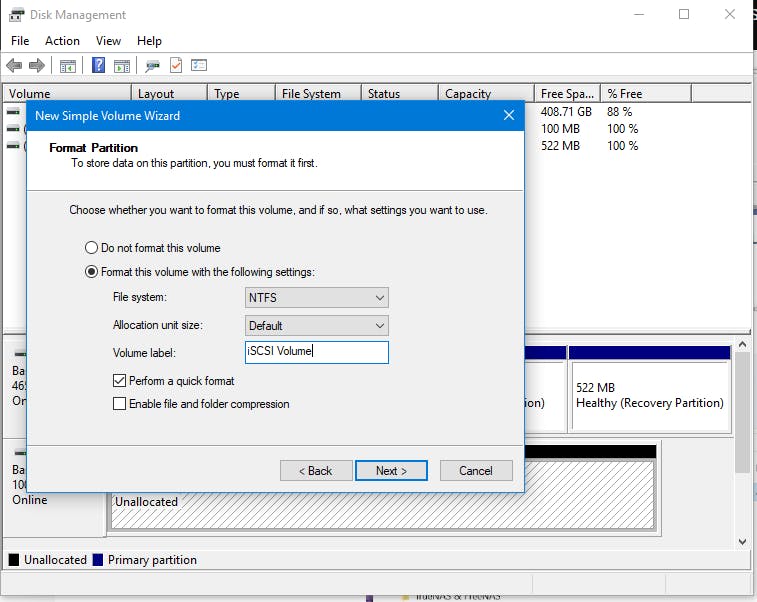
Finish the setup
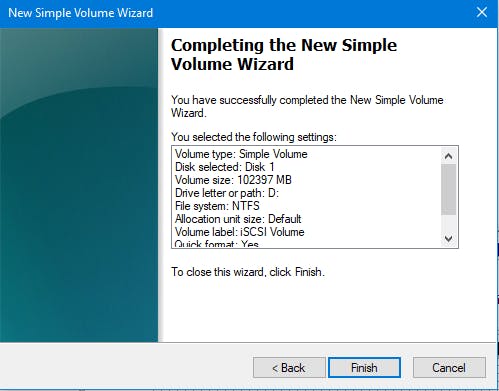
You can view the volume mounted as D Drive in File Explorer.
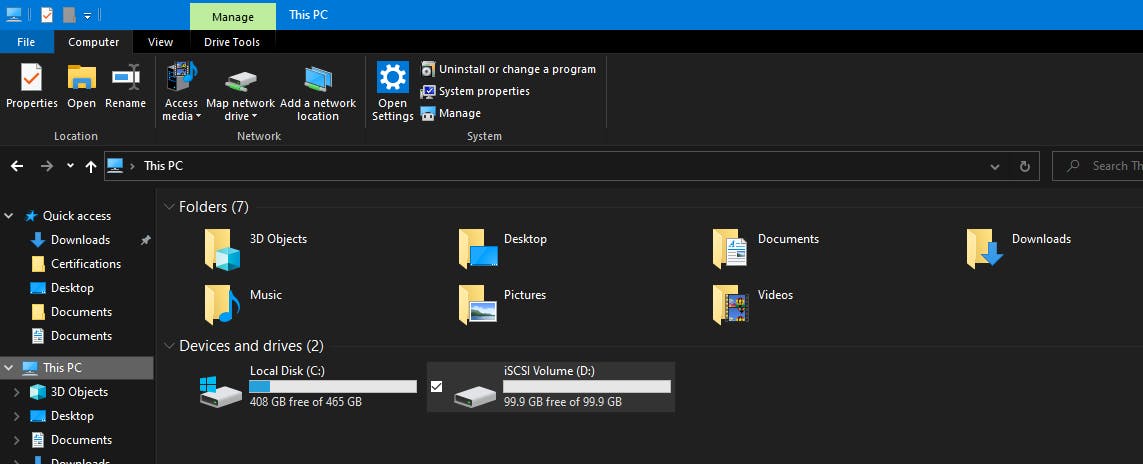
You should now be able to add, delete, and modify files and folders on your iSCSI drive.
Stage 6 - Exposing the Server to the Internet
Exposing the local host over the internet can be done in many ways.
Using a VPN connection to access the home server remotely can be a good option.
Enable Port forwarding in your home router settings for the particular port to access it remotely over the internet.
Purchase a domain and create a tunnel to access the server specifying the subdomains in DNS provider settings.
- Currently, I'm using this approach to serve this home server over my domain as my current ISP is a shared ISP which is blocking the port forwarding requests from my home router.
You can refer to the Cloudflare guide to create a tunnel - https://developers.cloudflare.com/cloudflare-one/connections/connect-networks/
Make sure to keep your server up-to-date with security patches and software updates, and regularly backup your data to make sure that it’s protected.
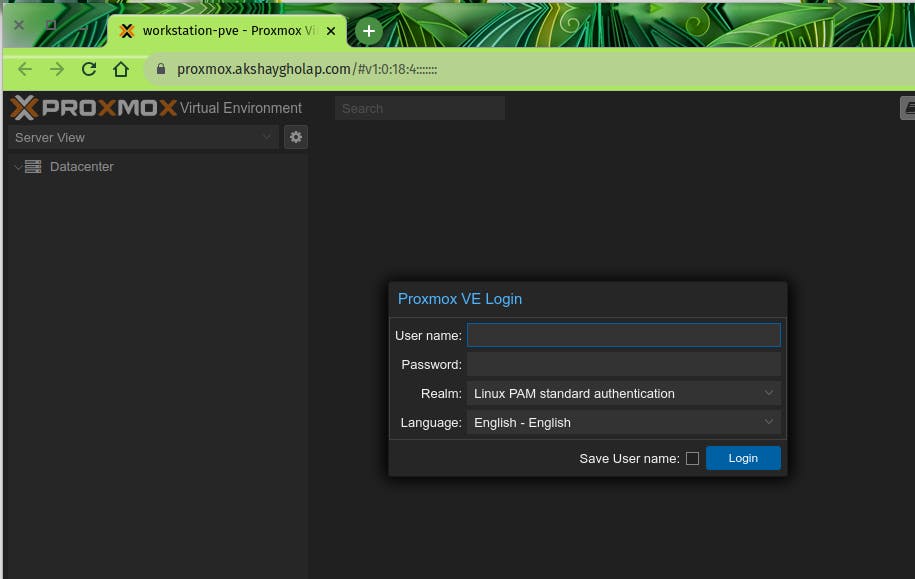
Accessing the Server Remotely
Proxmox Server using my subdomain
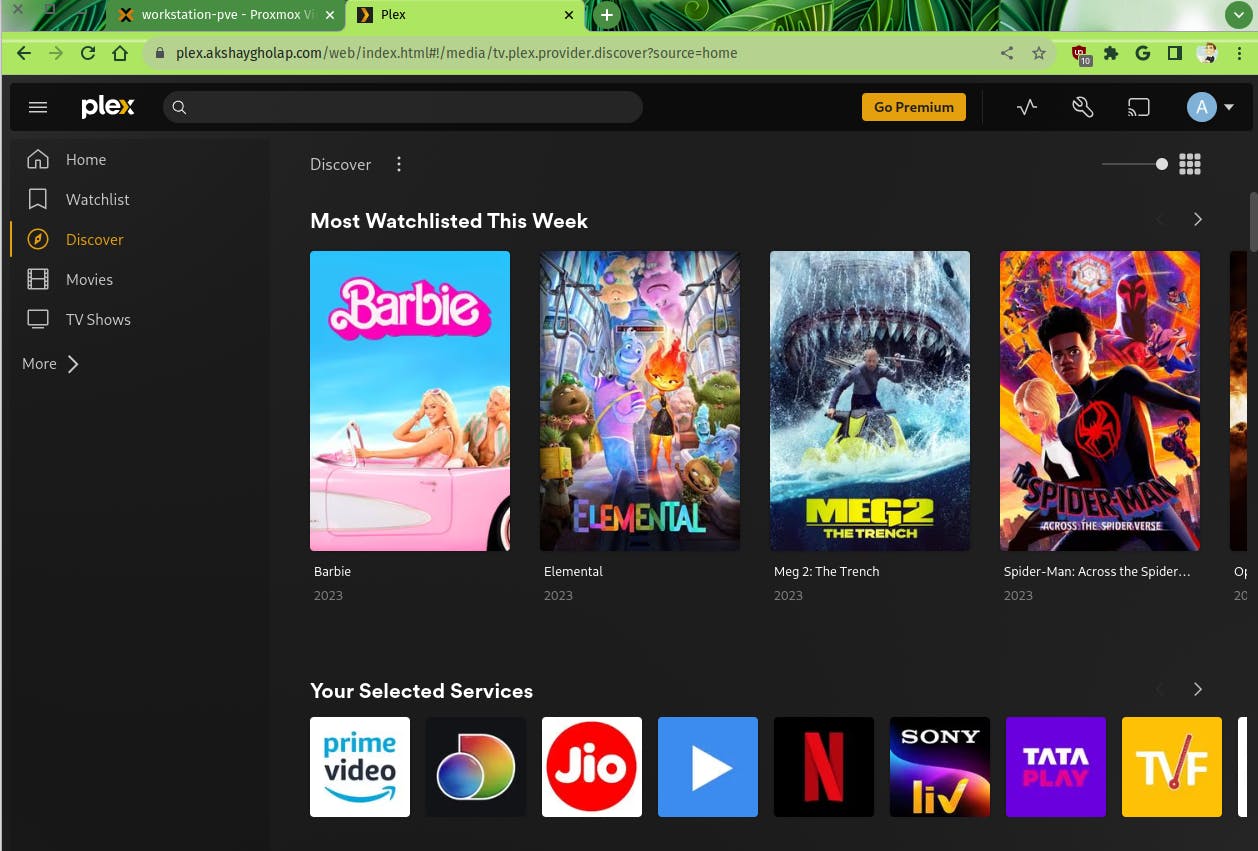
Plex Media Server
TrueNAS Server
Portainer

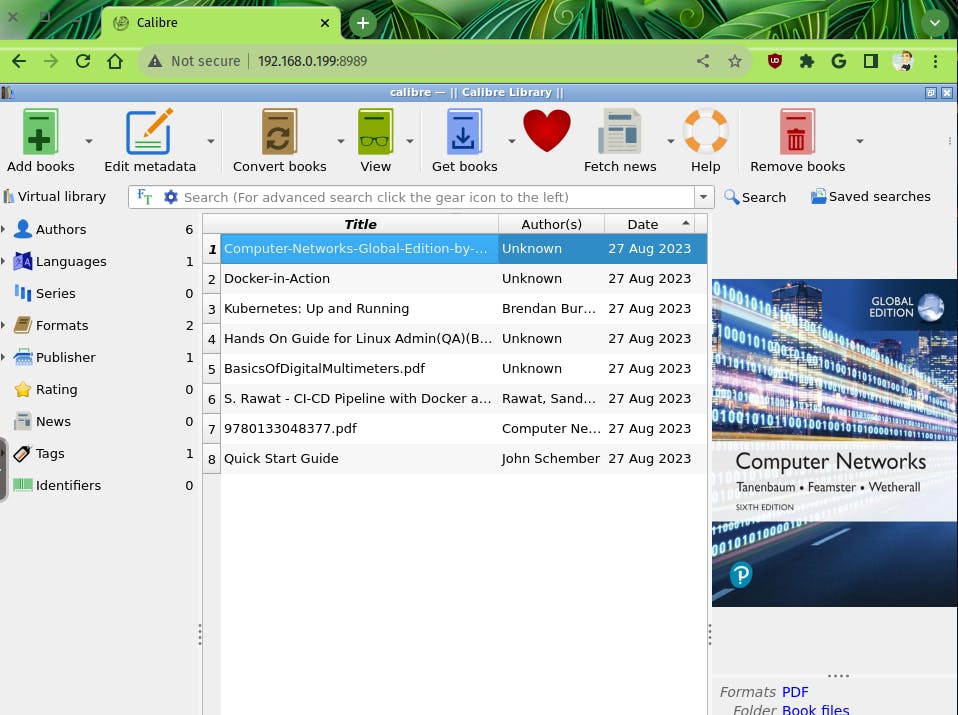
Calibre Server
What's Next?
PiHole - A layer of reverse DNS to cache the records locally which speeds up the name resolution and also blocks or whitelists the sites networkwide
Ansible Semaphore - To manage the Ansible playbooks for config management of the servers/containers on your home server.
Wazuh - To collect, aggregate, index, and analyze security data, helping to detect intrusions, threats, and behavioral anomalies.
Terraform - Automate the VM and Container creating tasks.
PiMox - Proxmox V7 for the Raspberry Pi
Pimox is a port of Proxmox to the Raspberry Pi allowing you to build a Proxmox cluster of Raspberry Pi's or even a hybrid cluster of Pis and x86 hardware.
That's it for now, There's a lot you can do with your own full-fledged server till then Thanks for taking the time to read this far, please do like, share, and comment I really appreciate any suggestions or improvements needed. :)